> ## Documentation Index
> Fetch the complete documentation index at: https://docs.thistle.tech/llms.txt
> Use this file to discover all available pages before exploring further.
# Securing AI Model Deployment on Grinn Genio 700 SOM
> Deliver an encrypted and signed AI model to the Grinn Genio 700 SOM via encrypted OTA update with Thistle
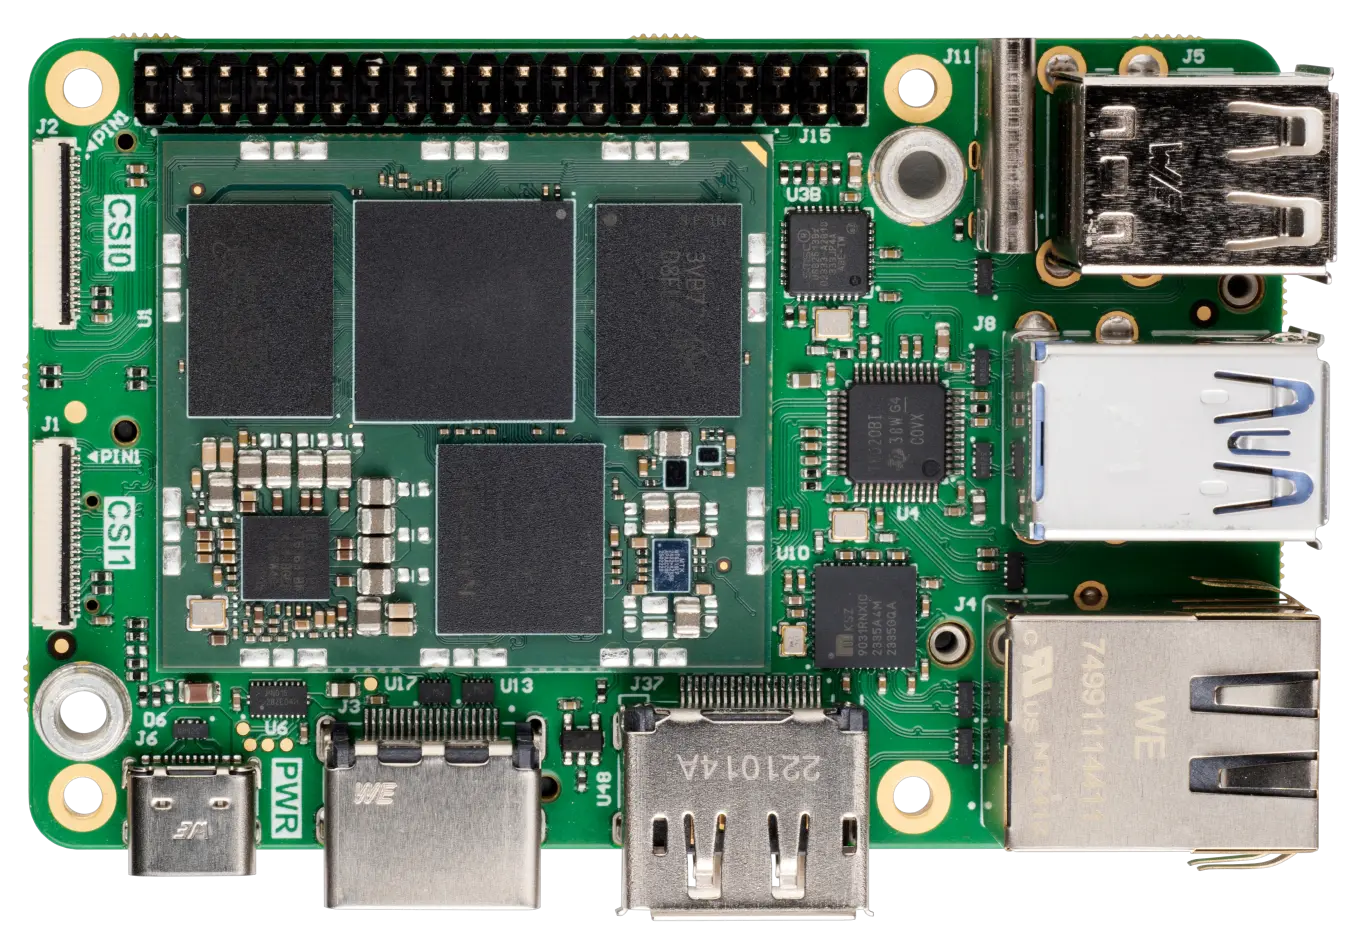 This guide walks you through delivering an AI model file to a
[Grinn Genio 700 SOM](https://wiki.grinn-global.com/products/genio/grinn-genio-700-sbc/)
with full end-to-end security:
* The OTA update bundle is **encrypted in transit and in the cloud**
(`--encrypt-ota --zip-target`)
* The AI model file is **end-to-end encrypted** and remains encrypted at rest on
the device until explicitly decrypted (`--encrypt-ai-model`)
* The AI model file is **digitally signed** so the device can verify its
authenticity before use (`--sign-ai-model`)
You will run TRH on a laptop/desktop to prepare and publish the release, and TUC
on the Grinn Genio 700 SOM to receive, verify, and decrypt the model.
## Prerequisites
* A Grinn Genio 700 SOM board with a working Linux image and network
connectivity. See the
[Grinn Genio 700 SOM setup guide](/hardware/grinn/genio-700-som/file-update-with-optiga-trust-m#grinn-setup)
for flashing instructions.
* Version 1.8.0 (or above) of TUC and TRH for your platform
* The [Thistle Update Client](/binaries#thistle-update-client-tuc): runs on the
Grinn board to fetch and install OTA updates
* The [Thistle Release Helper](/binaries#release-helper-trh): runs on your
laptop/desktop to prepare and publish releases
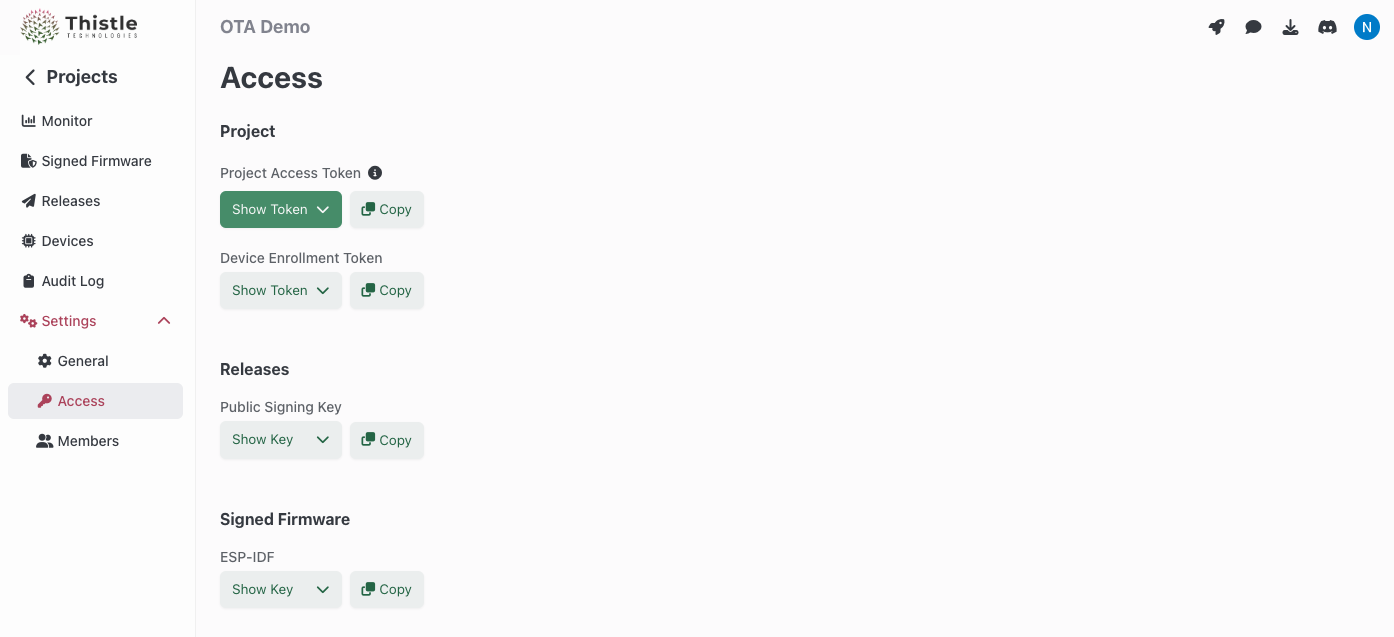
* On the [Thistle Control Center](https://app.thistle.tech/projects), obtain the
API token ("Project Access Token") from your project's settings to be used as
`THISTLE_TOKEN` below.
This guide walks you through delivering an AI model file to a
[Grinn Genio 700 SOM](https://wiki.grinn-global.com/products/genio/grinn-genio-700-sbc/)
with full end-to-end security:
* The OTA update bundle is **encrypted in transit and in the cloud**
(`--encrypt-ota --zip-target`)
* The AI model file is **end-to-end encrypted** and remains encrypted at rest on
the device until explicitly decrypted (`--encrypt-ai-model`)
* The AI model file is **digitally signed** so the device can verify its
authenticity before use (`--sign-ai-model`)
You will run TRH on a laptop/desktop to prepare and publish the release, and TUC
on the Grinn Genio 700 SOM to receive, verify, and decrypt the model.
## Prerequisites
* A Grinn Genio 700 SOM board with a working Linux image and network
connectivity. See the
[Grinn Genio 700 SOM setup guide](/hardware/grinn/genio-700-som/file-update-with-optiga-trust-m#grinn-setup)
for flashing instructions.
* Version 1.8.0 (or above) of TUC and TRH for your platform
* The [Thistle Update Client](/binaries#thistle-update-client-tuc): runs on the
Grinn board to fetch and install OTA updates
* The [Thistle Release Helper](/binaries#release-helper-trh): runs on your
laptop/desktop to prepare and publish releases
* On the [Thistle Control Center](https://app.thistle.tech/projects), obtain the
API token ("Project Access Token") from your project's settings to be used as
`THISTLE_TOKEN` below.
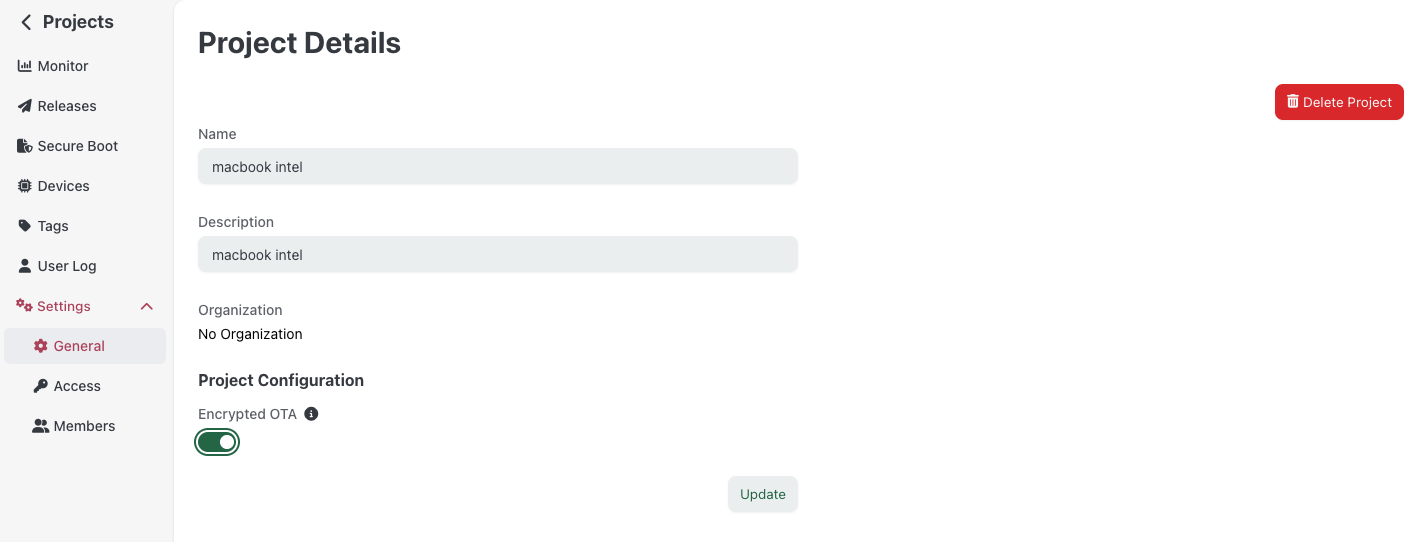
 In **Settings > General > Project Configuration**, make sure the "Encrypted
OTA" feature is on.
In **Settings > General > Project Configuration**, make sure the "Encrypted
OTA" feature is on.
 ## Step 1: Initialize TRH (laptop/desktop)
Configure your Thistle project's access token and initialize the local working
environment.
```bash theme={"dark"}
$ export THISTLE_TOKEN=$(cat)
(paste access token, press enter, then ctrl-d)
$ ./trh --signing-method="remote" init
```
```powershell theme={"dark"}
$ $env:THISTLE_TOKEN = "[Access Token Obtained from Thistle App's Project Settings section]"
$ .\trh.exe --signing-method="remote" init
```
The `init` command creates a Cloud-KMS-backed key pair on the Thistle backend
(or retrieves the existing public key if one already exists). The private key is
used to sign the OTA update bundle, sign AI model files, and encrypt AI model
files. A manifest template `manifest.json` is created locally in the current
directory.
Your local working environment is now ready.
## Step 2: Prepare the encrypted and signed AI model (laptop/desktop)
Place the AI model file `model.pt` in a release directory and run `trh prepare`
with all three security flags.
```bash theme={"dark"}
$ mkdir -p model_release
$ echo "This is a dummy PyTorch AI model file" > model_release/model.pt
$ trh --signing-method="remote" prepare \
--target="model_release" \
--file-base-path="/tmp/ai-models/" \
--encrypt-ai-model \
--sign-ai-model \
--encrypt-ota --zip-target
```
This single command does the following:
1. **Encrypts** `model.pt` into `model.pt.thistlepfe` (per-file encryption)
2. **Signs** the encrypted `model.pt.thistlepfe` to produce
`model.pt.thistlepfe.thistlesig`
3. **Packages** both files into an encrypted OTA zip bundle
The signature is generated for the encrypted artifact, so the device can verify
authenticity of the encrypted model without needing to decrypt it first.
## Step 3: Publish the release (laptop/desktop)
Upload the encrypted OTA bundle and signed manifest to the Thistle backend.
```bash theme={"dark"}
$ trh --signing-method="remote" release
```
## Step 4: Generate device configuration (laptop/desktop)
Create a TUC configuration file for the Grinn board.
```bash theme={"dark"}
$ trh --signing-method="remote" gen-device-config \
--device-name="grinn-genio700-ai-demo" \
--enrollment-type="pre-enroll" \
--persist="/tmp/ota" \
--config-path="./tuc-config.json"
```
Transfer the generated `tuc-config.json` to the Grinn Genio 700 SOM board (e.g.,
via `scp`).
## Step 5: Receive the OTA update (Grinn board)
On the Grinn board, download the TUC binary (if not already present) and run it
with the configuration file.
```bash theme={"dark"}
$ wget https://downloads.thistle.tech/embedded-client/1.8.0/tuc-1.8.0-aarch64-unknown-linux-musl.gz
$ gunzip tuc-1.8.0-aarch64-unknown-linux-musl.gz
$ chmod +x tuc-1.8.0-aarch64-unknown-linux-musl
$ mv tuc-1.8.0-aarch64-unknown-linux-musl tuc
$ ./tuc --log-level info -c tuc-config.json
```
TUC automatically decrypts the OTA bundle and installs the encrypted AI model
file. When the update finishes, you should see the encrypted model at
`/tmp/ai-models/model.pt.thistlepfe` and its signature at
`/tmp/ai-models/model.pt.thistlepfe.thistlesig`.
The AI model file remains encrypted at rest on the device. TUC handles OTA
bundle decryption automatically, but the per-file encrypted model requires
explicit decryption (next step).
## Step 6: Verify the AI model signature (Grinn board)
Before decrypting, verify that the encrypted model is authentic and was signed by
the expected release pipeline.
```bash theme={"dark"}
$ ./tuc --log-level info -c tuc-config.json verify-file \
/tmp/ai-models/model.pt.thistlepfe \
/tmp/ai-models/model.pt.thistlepfe.thistlesig
.. Device id:
!! Thistle client starting up - version 1.8.0
.. signature is claimed to be signed at timestamp
.. signature verified with public key #0 type ecdsa
.. success
```
If the encrypted model or its signature has been tampered with, `verify-file`
will report failure and return a non-zero exit code. Your application can use
this result to decide whether to proceed.
## Step 7: Decrypt the AI model for inference (Grinn board)
Once verified, decrypt the model file for use by the AI application.
```bash theme={"dark"}
$ mkdir -p /tmp/decrypted
$ ./tuc -c tuc-config.json decrypt-file \
/tmp/ai-models/model.pt.thistlepfe \
/tmp/decrypted/model.pt
.. Device id:
!! Thistle client starting up - version 1.8.0
.. success
```
The AI application can now load the decrypted model from
`/tmp/decrypted/model.pt` for inference.
## Putting it all together
The recommended workflow for an AI application on the Grinn board is:
1. TUC fetches and installs the encrypted OTA bundle automatically
2. The application calls `tuc verify-file` to confirm the model's authenticity
3. If verification succeeds, the application calls `tuc decrypt-file` to obtain
the plaintext model
4. The application loads the decrypted model for inference
This ensures the AI model is protected end-to-end: encrypted in the cloud,
encrypted in transit, signed for authenticity, and encrypted at rest on the
device until the moment it is needed.
## Step 1: Initialize TRH (laptop/desktop)
Configure your Thistle project's access token and initialize the local working
environment.
```bash theme={"dark"}
$ export THISTLE_TOKEN=$(cat)
(paste access token, press enter, then ctrl-d)
$ ./trh --signing-method="remote" init
```
```powershell theme={"dark"}
$ $env:THISTLE_TOKEN = "[Access Token Obtained from Thistle App's Project Settings section]"
$ .\trh.exe --signing-method="remote" init
```
The `init` command creates a Cloud-KMS-backed key pair on the Thistle backend
(or retrieves the existing public key if one already exists). The private key is
used to sign the OTA update bundle, sign AI model files, and encrypt AI model
files. A manifest template `manifest.json` is created locally in the current
directory.
Your local working environment is now ready.
## Step 2: Prepare the encrypted and signed AI model (laptop/desktop)
Place the AI model file `model.pt` in a release directory and run `trh prepare`
with all three security flags.
```bash theme={"dark"}
$ mkdir -p model_release
$ echo "This is a dummy PyTorch AI model file" > model_release/model.pt
$ trh --signing-method="remote" prepare \
--target="model_release" \
--file-base-path="/tmp/ai-models/" \
--encrypt-ai-model \
--sign-ai-model \
--encrypt-ota --zip-target
```
This single command does the following:
1. **Encrypts** `model.pt` into `model.pt.thistlepfe` (per-file encryption)
2. **Signs** the encrypted `model.pt.thistlepfe` to produce
`model.pt.thistlepfe.thistlesig`
3. **Packages** both files into an encrypted OTA zip bundle
The signature is generated for the encrypted artifact, so the device can verify
authenticity of the encrypted model without needing to decrypt it first.
## Step 3: Publish the release (laptop/desktop)
Upload the encrypted OTA bundle and signed manifest to the Thistle backend.
```bash theme={"dark"}
$ trh --signing-method="remote" release
```
## Step 4: Generate device configuration (laptop/desktop)
Create a TUC configuration file for the Grinn board.
```bash theme={"dark"}
$ trh --signing-method="remote" gen-device-config \
--device-name="grinn-genio700-ai-demo" \
--enrollment-type="pre-enroll" \
--persist="/tmp/ota" \
--config-path="./tuc-config.json"
```
Transfer the generated `tuc-config.json` to the Grinn Genio 700 SOM board (e.g.,
via `scp`).
## Step 5: Receive the OTA update (Grinn board)
On the Grinn board, download the TUC binary (if not already present) and run it
with the configuration file.
```bash theme={"dark"}
$ wget https://downloads.thistle.tech/embedded-client/1.8.0/tuc-1.8.0-aarch64-unknown-linux-musl.gz
$ gunzip tuc-1.8.0-aarch64-unknown-linux-musl.gz
$ chmod +x tuc-1.8.0-aarch64-unknown-linux-musl
$ mv tuc-1.8.0-aarch64-unknown-linux-musl tuc
$ ./tuc --log-level info -c tuc-config.json
```
TUC automatically decrypts the OTA bundle and installs the encrypted AI model
file. When the update finishes, you should see the encrypted model at
`/tmp/ai-models/model.pt.thistlepfe` and its signature at
`/tmp/ai-models/model.pt.thistlepfe.thistlesig`.
The AI model file remains encrypted at rest on the device. TUC handles OTA
bundle decryption automatically, but the per-file encrypted model requires
explicit decryption (next step).
## Step 6: Verify the AI model signature (Grinn board)
Before decrypting, verify that the encrypted model is authentic and was signed by
the expected release pipeline.
```bash theme={"dark"}
$ ./tuc --log-level info -c tuc-config.json verify-file \
/tmp/ai-models/model.pt.thistlepfe \
/tmp/ai-models/model.pt.thistlepfe.thistlesig
.. Device id:
!! Thistle client starting up - version 1.8.0
.. signature is claimed to be signed at timestamp
.. signature verified with public key #0 type ecdsa
.. success
```
If the encrypted model or its signature has been tampered with, `verify-file`
will report failure and return a non-zero exit code. Your application can use
this result to decide whether to proceed.
## Step 7: Decrypt the AI model for inference (Grinn board)
Once verified, decrypt the model file for use by the AI application.
```bash theme={"dark"}
$ mkdir -p /tmp/decrypted
$ ./tuc -c tuc-config.json decrypt-file \
/tmp/ai-models/model.pt.thistlepfe \
/tmp/decrypted/model.pt
.. Device id:
!! Thistle client starting up - version 1.8.0
.. success
```
The AI application can now load the decrypted model from
`/tmp/decrypted/model.pt` for inference.
## Putting it all together
The recommended workflow for an AI application on the Grinn board is:
1. TUC fetches and installs the encrypted OTA bundle automatically
2. The application calls `tuc verify-file` to confirm the model's authenticity
3. If verification succeeds, the application calls `tuc decrypt-file` to obtain
the plaintext model
4. The application loads the decrypted model for inference
This ensures the AI model is protected end-to-end: encrypted in the cloud,
encrypted in transit, signed for authenticity, and encrypted at rest on the
device until the moment it is needed.