Introduction & Basics
Introduction
Thistle’s developer-facing documentation portal
Here you will find tutorials and references for one to quickly get familiar with Thistle’s products. For advance usage or custom support request, please contact Thistle’s customer support at https://thistle.tech/contact.
 Want to see how easy it is to get started? Check out our live demo to explore the Thistle platform in action.
Each of the Thistle products consists of three components:
Thistle Product Overview
Thistle provides a modern security platform for IoT and embedded device manufacturers, designed to increase security resilience and decrease development time. The platform is composed of several integrated products:Thistle OTA Update
A turnkey, end-to-end solution for secure and reliable device firmware/software updates. Features include:
- Signed updates and reliable fail-over
- Easy integration with Linux or Windows devices
- Securely fetch and install assets or new software versions
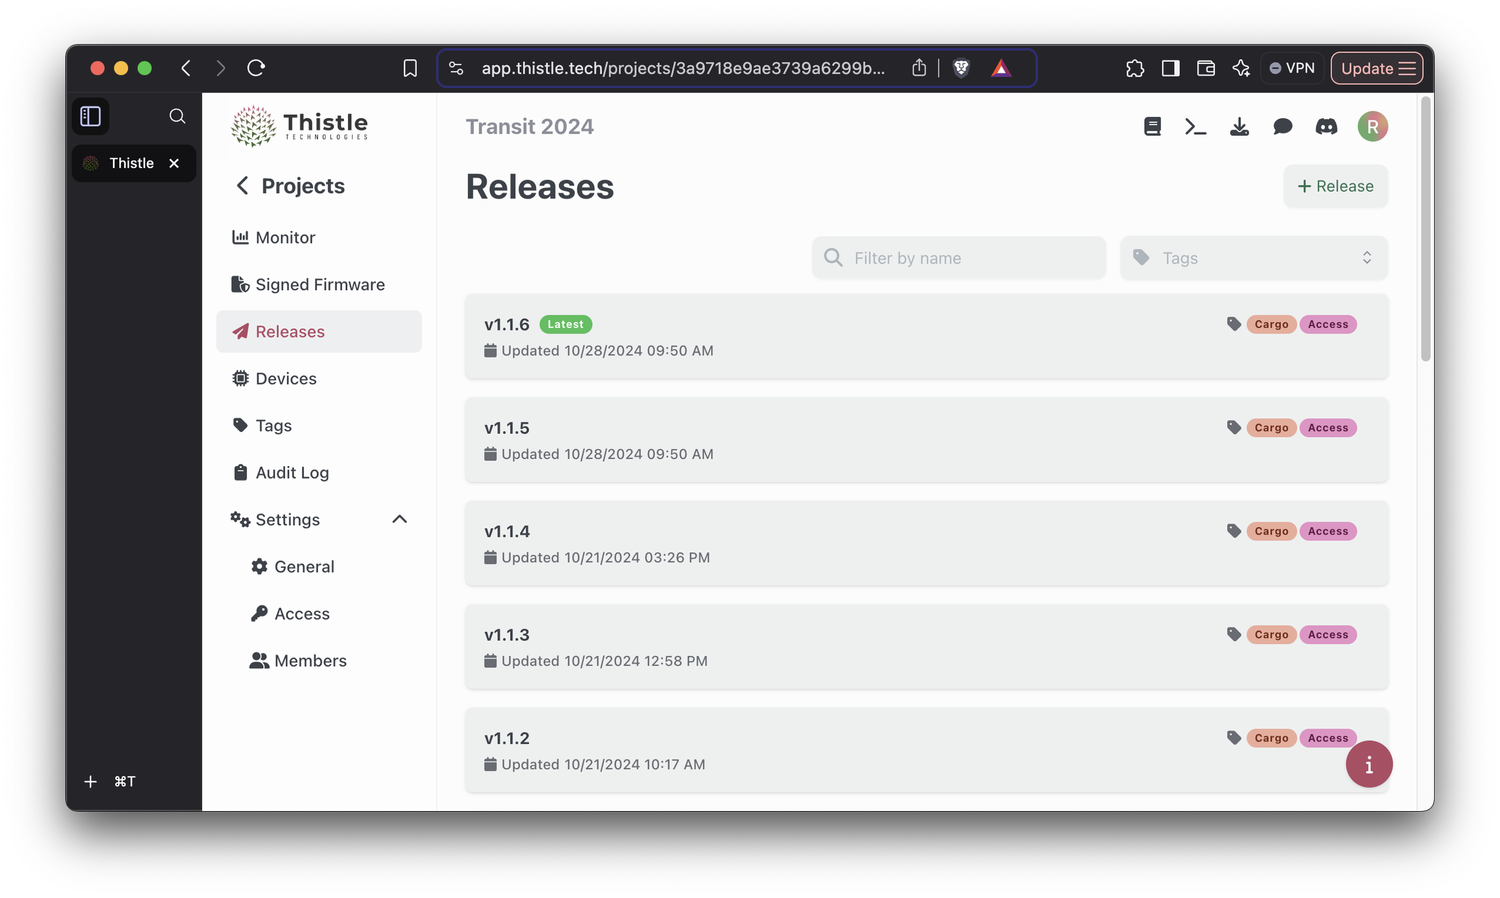
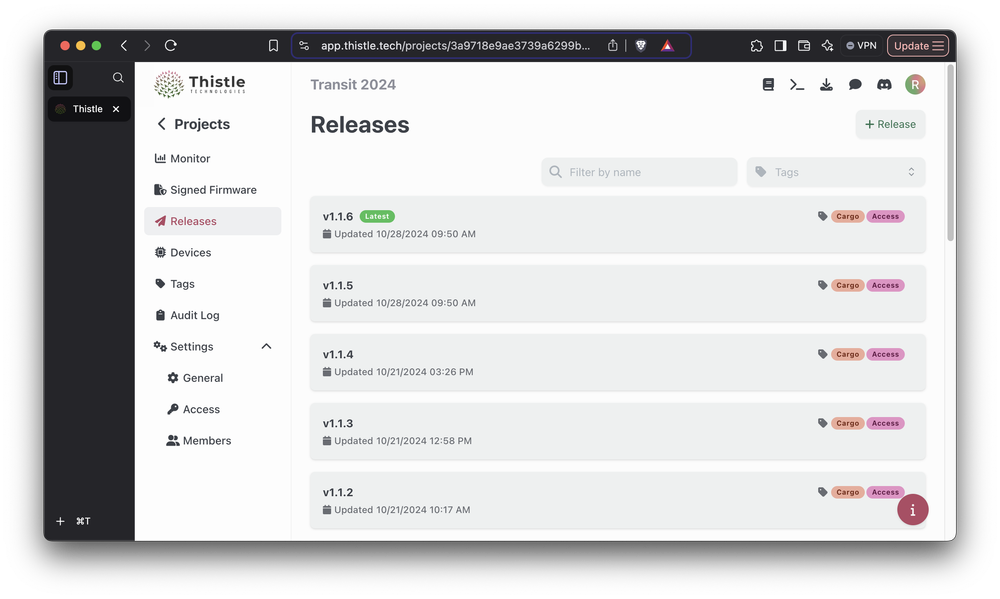
- Intuitive UI for managing releases
Thistle Secure/Verified Boot
Tools and services to enable secure/verified boot on supported hardware, ensuring only trusted software runs on your devices. Includes:
- Cryptographic verification of all software
- Strong key management and signing controls
- Support for ESP32 Secure Boot V2 and Infineon OPTIGA™ Trust M with U-Boot
Thistle Control Center
A comprehensive web application for managing your device fleet and releases. Features include:
- Device fleet management and monitoring
- Release management and deployment controls
- Real-time device status and update tracking
- User access controls and team management
Thistle Developer Tools
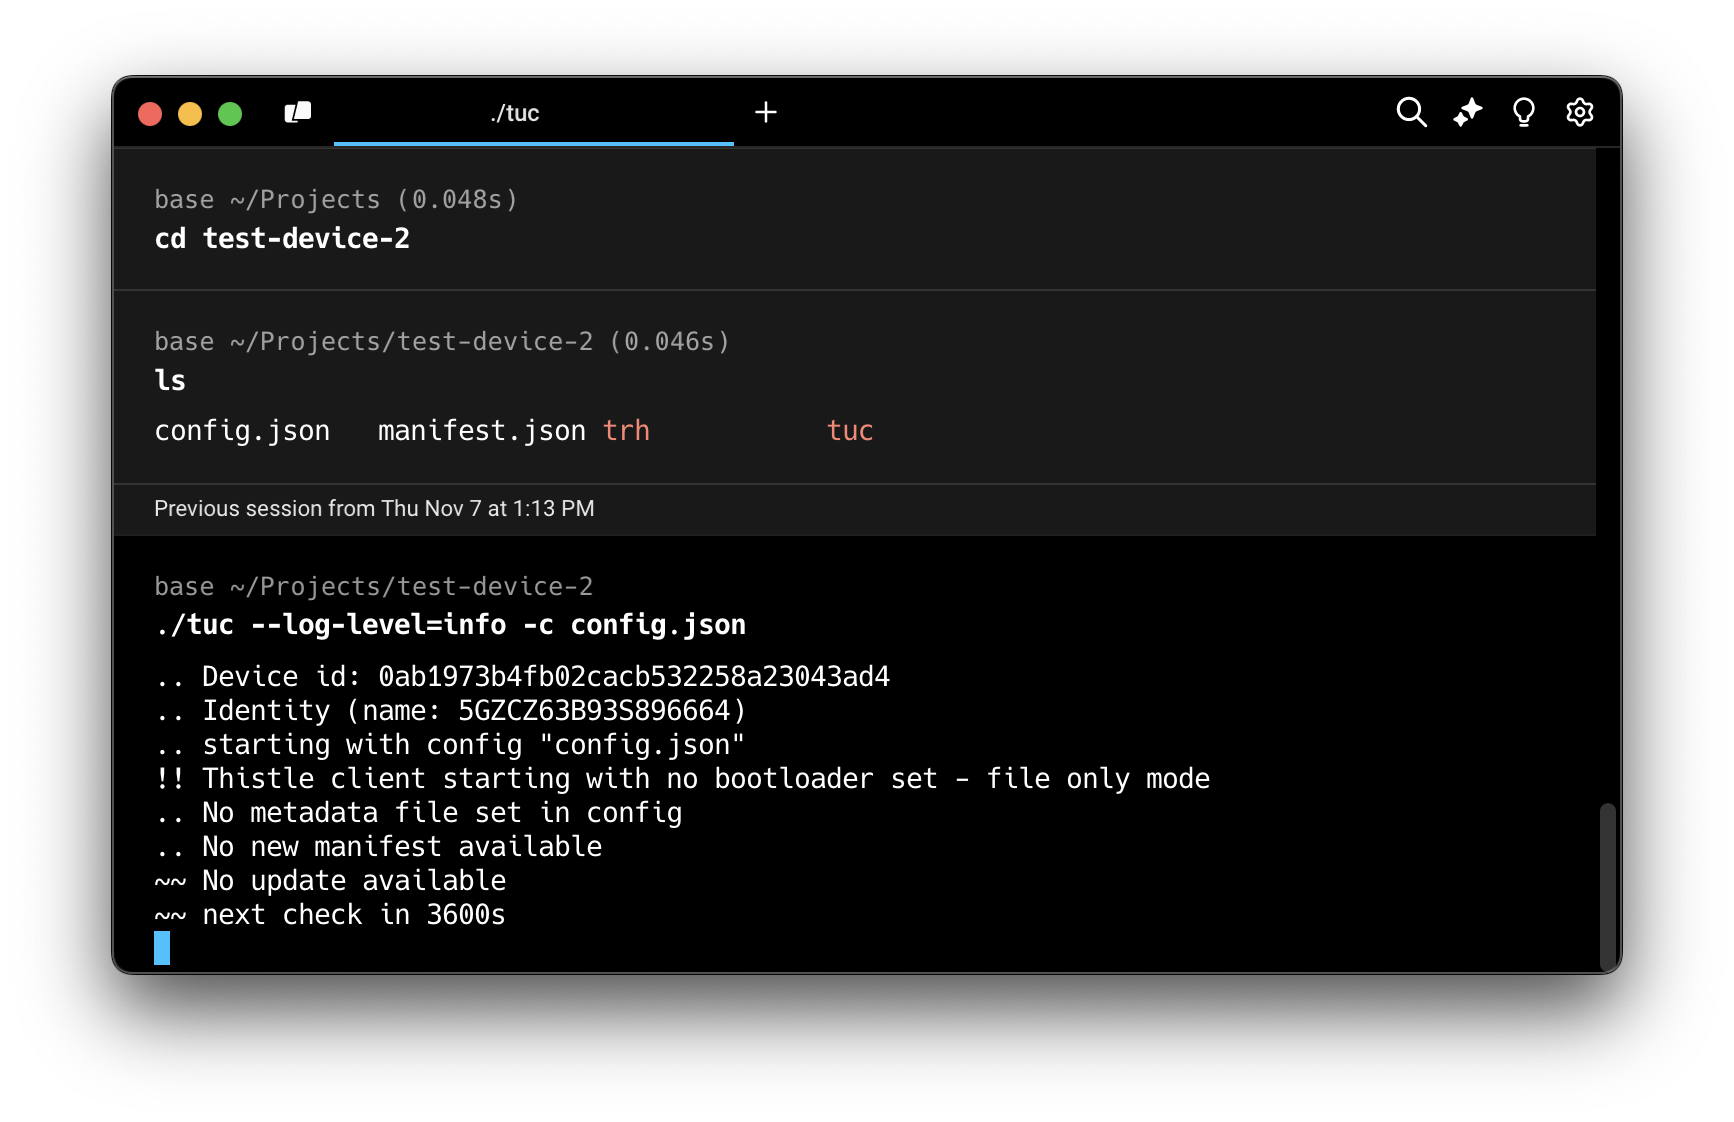
Command-line tools and SDKs for seamless integration into your development workflow. Includes:
- CLI tools for device provisioning and management
- Build system integration and automation
- Local development and testing capabilities
- Comprehensive documentation and examples
Each of the Thistle products consists of three components:
- Device software: Code running on hardware devices to provide security functionality
- Thistle Cloud: Backend infrastructure, web applications and services API to support device security
- Developer tools: Command-line tools running on developers’ laptops/desktops to interact with device software and Thistle Cloud
OTA Update Solution
This is an end-to-end, turnkey solution for device firmware/software update that is strong and flexible in reliability and security. This product includes device software, developer tools, and Thistle Cloud components. Supported devices:- Devices powered by embedded Linux, across multiple architectures including ARM/ARM64 and x86-64, specifically. Section OTA Update provides a tutorial on our embedded Linux update client
- Devices running the Zephyr RTOS. For integration enquiries, please contact Thistle’s customer support
CI/CD integration
You are able to automate the OTA release process from a CI/CD pipeline with Thistle. If you use GitHub for development, GitHub action Create OTA Release is available to help create an OTA update release, and publishes it to Thistle’s backend platform to update devices running the Thistle Update Client (TUC).Secure Boot Enablement Solution
We provide tools and services to help our customers enable secure/verified boot on supported hardware. This product includes device software, developer tools, and Thistle Cloud components. Specifically, we provide strong security assurance with respect to production firmware signing key management, ensuring strong confidentiality of the signing key, and a tight control of firmware signing operations Supported devices and secure boot types:- Secure Boot V2 for devices with ESP32 chips. Thistle’s Espressif DevCon 2023 talk gives an overview of this solution
- Thistle Verified Boot for devices with an Infineon OPTIGA™ Trust M secure element with the U-Boot bootloader on host and I²C for host-Trust M communication