By the end of this guide you will have your Raspberry Pi 4 integrated with
Thistle Verified Boot. This integration relies on an Infineon OPTIGA(TM) Trust M
as the immutable storage for the Linux kernel verification public key.
Hardware for This Tutorial
-
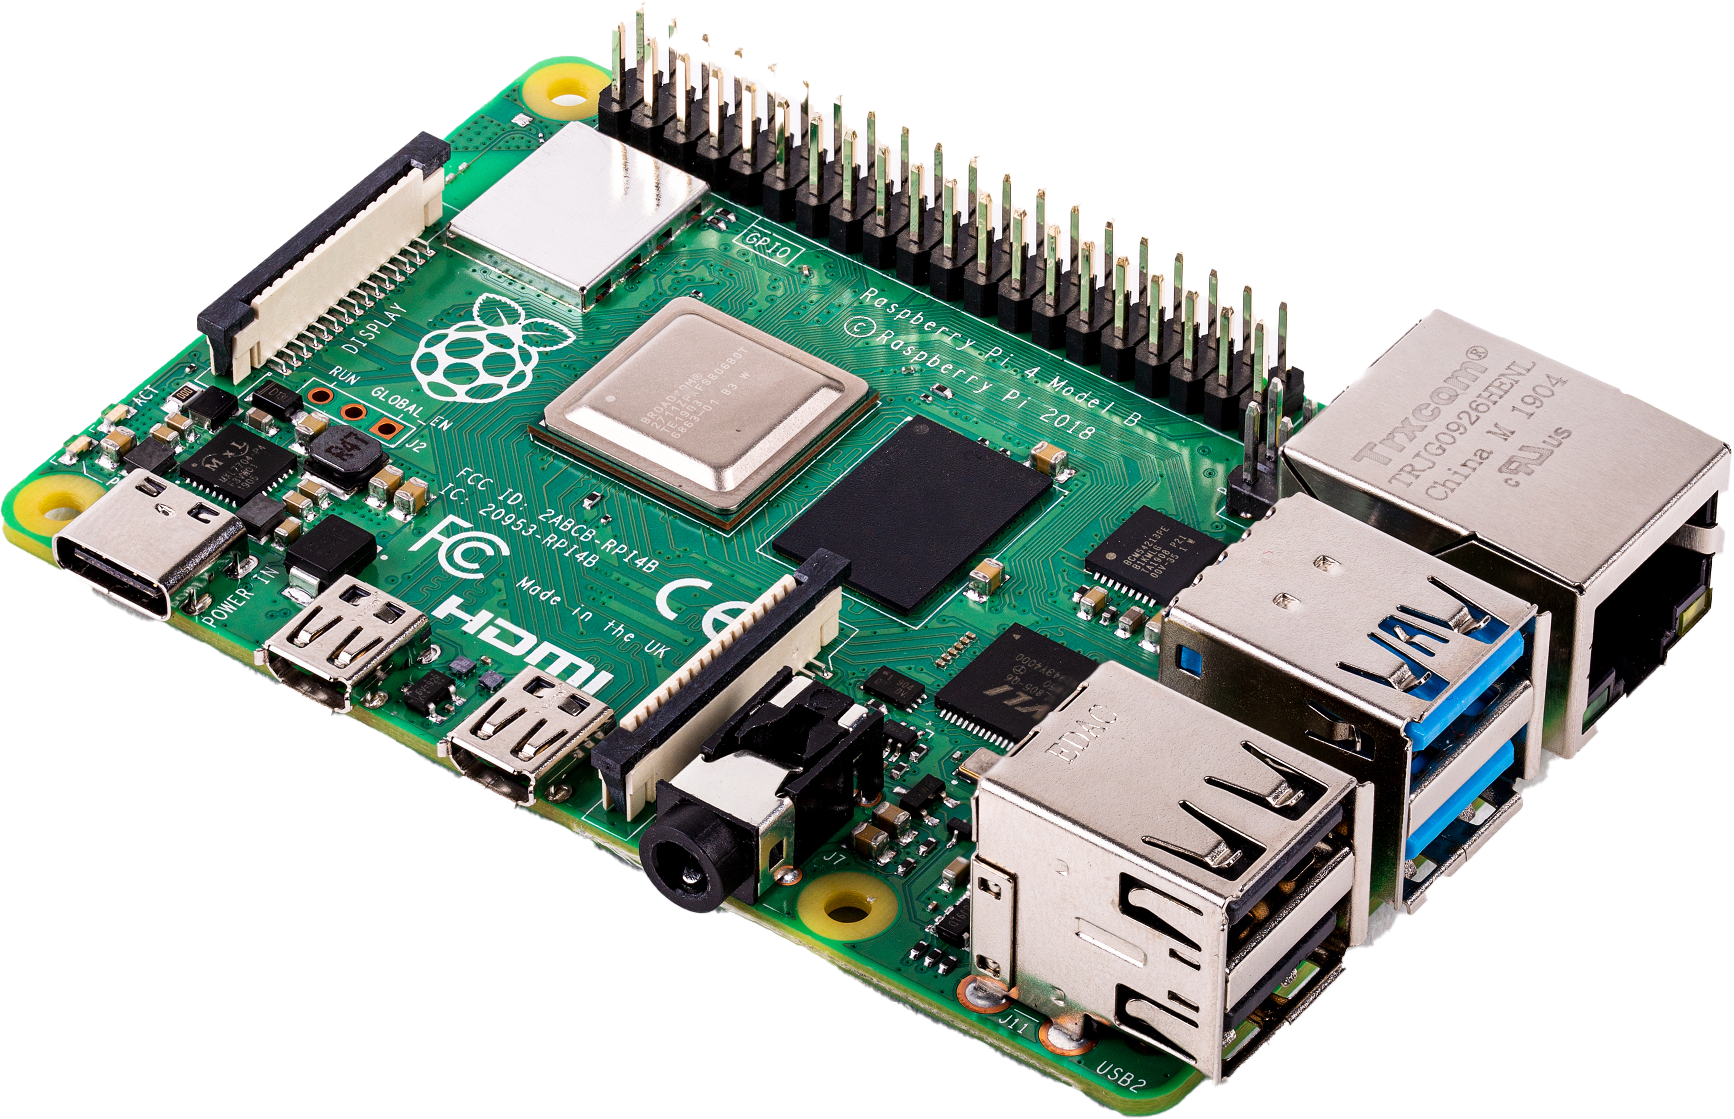
One Raspberry Pi 4 Model
B single-board
computer with accessories including a microSD card that’s 32GB or larger. Any
CanaKit Raspberry Pi 4 Starter
Kit will work. This
is the target host device for TVB integration.
-
One USB-A thumb drive (64GB or larger), for example SanDisk 64GB Ultra USB
3.0 Flash Drive -
SDCZ48-064G-UAM46.
We will program the USB drive, and use it to boot the Raspberry Pi into a
“utility” OS to prepare the secure element and the microSD card for TVB
integration.
-
One OPTIGA Trust M V3 shield board. We recommend TRUST M SHIELD
SP006068634, which can be purchased from Mouser. This
is the secure element for TVB integration.
-
One SparkFun Qwiic or Stemma QT SHIM for Raspberry Pi /
SBC. This is a SHIM for an easy,
solderless Raspberry Pi/Trust M connection.
-
One STEMMA QT / Qwiic JST SH 4-Pin Cable - 50mm
Long. This cable is for the Raspberry
Pi/Trust M connection.
-
One desktop/laptop PC running Linux, MacOS X, or Windows, for programming the
USB drive, controlling the Raspberry Pi, and observing its logs.
-
One USB to TTL Serial Cable - Debug / Console Cable for Raspberry
Pi. If your PC runs Windows or MacOS X,
you need to install the associated PL2303 and CP2102 drivers by following
instructions in the preceding link. The cable is used to connect the PC to the
Raspberry Pi’s UART port, to observe boot logs.
TVB Demo Preparation
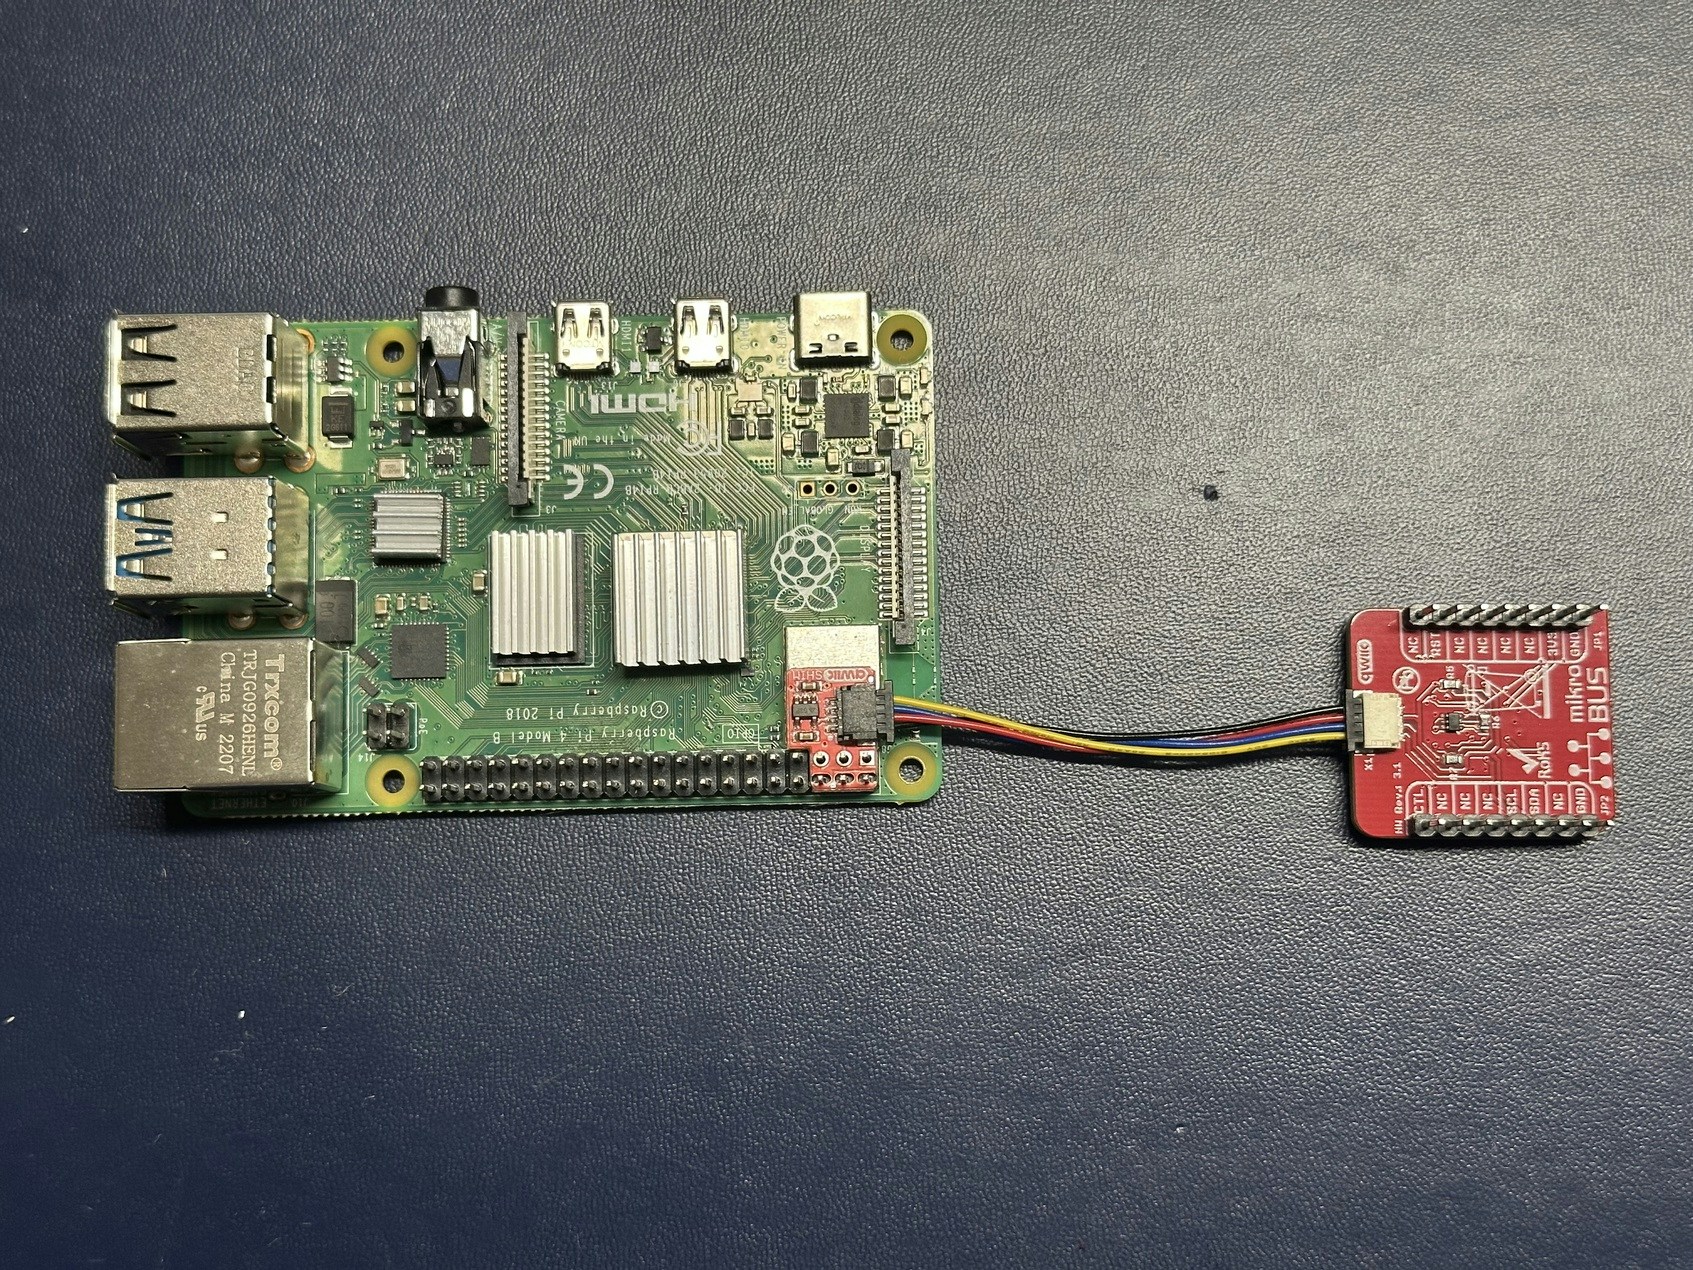
Connect Raspberry Pi 4 (RPi-4) and Trust M over I2C
Plug the SHIM to the RPi-4’s I2C bus, and connect it to the Trust M mikroBUS
shield board using the 4-pin cable, as illustrated below.
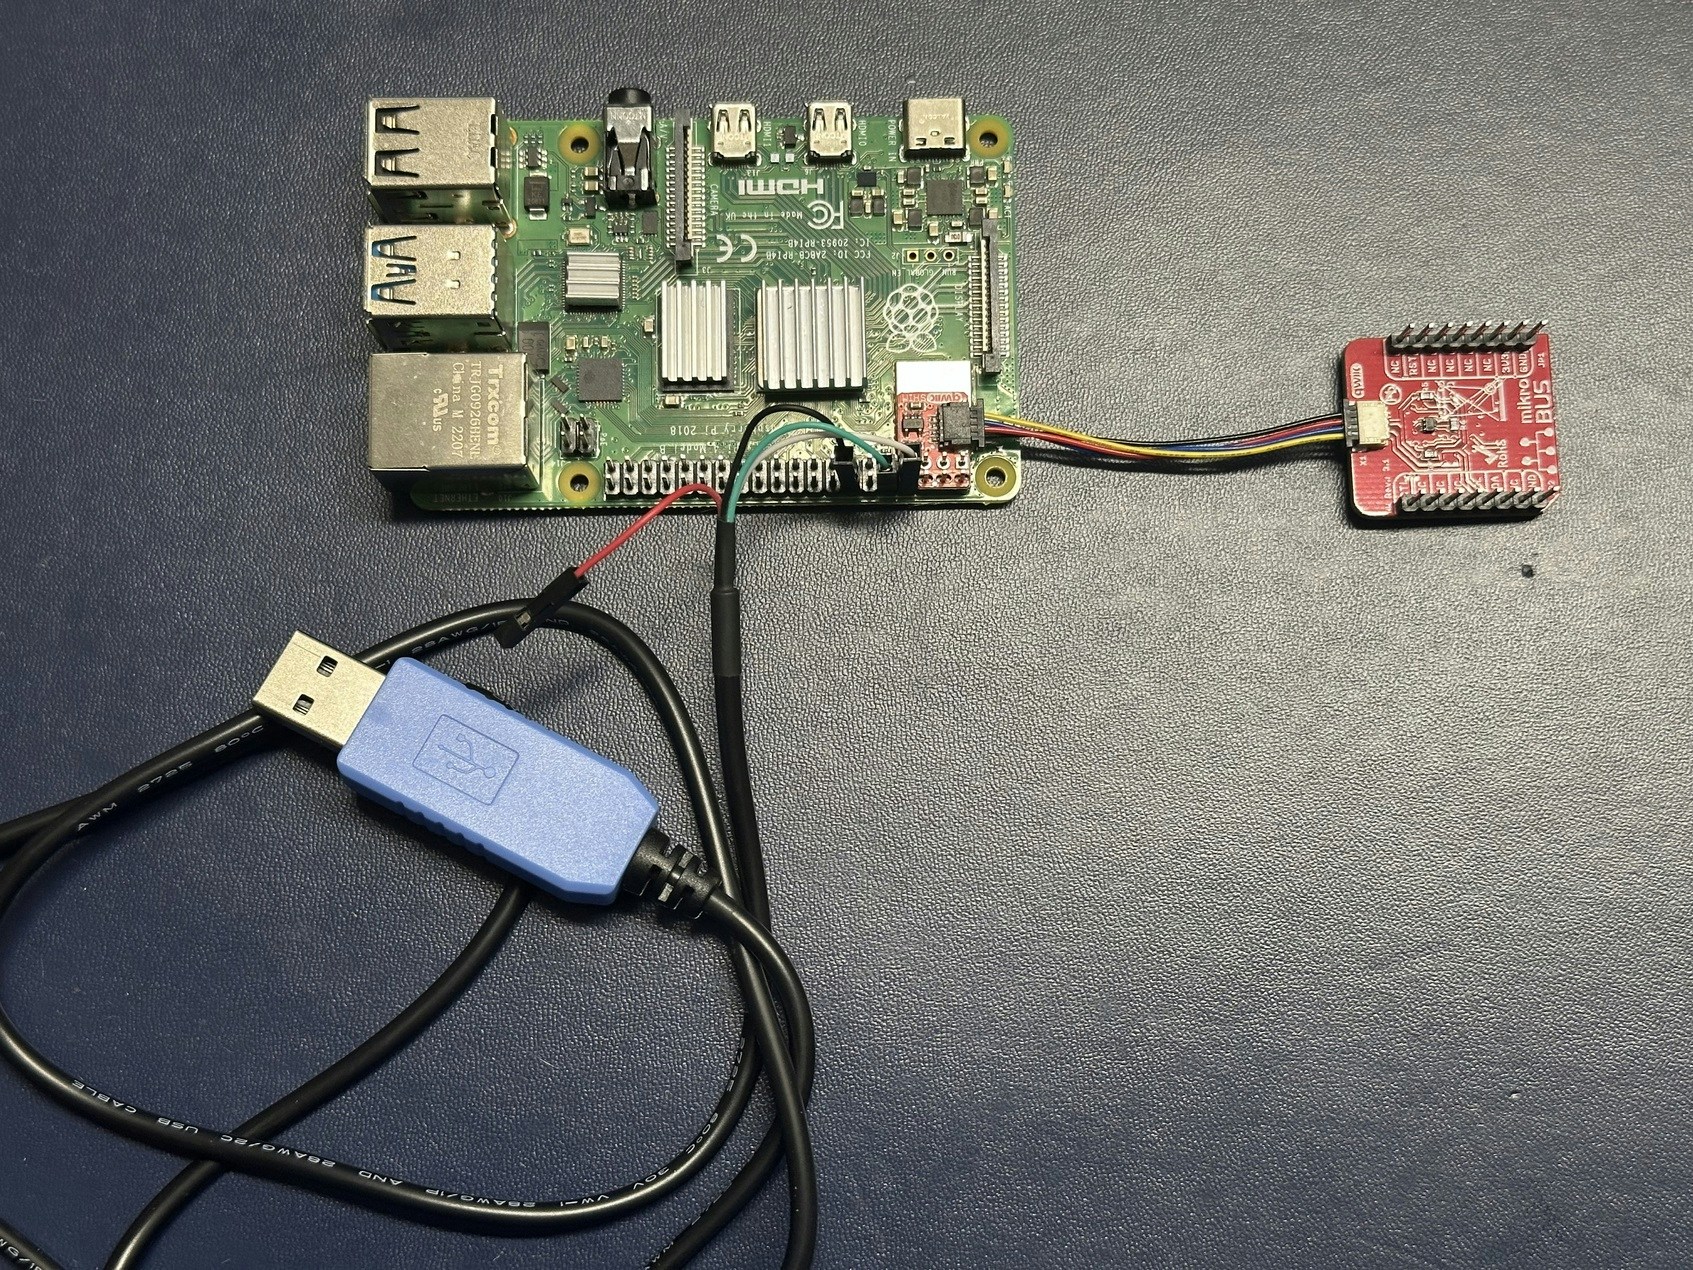
Connect PC and RPi-4 over Serial Port
Connect the RPi-4’s Pin 14 (GND), Pin 8 (GPIO 14 / TXD), and Pin 10 (GPIO 15 /
RXD) to the Ground (black), RXD (white), and TXD (green) of the USB To TTL
serial cable, respectively. Plug the other end of the cable (USB-A male) to the
PC.
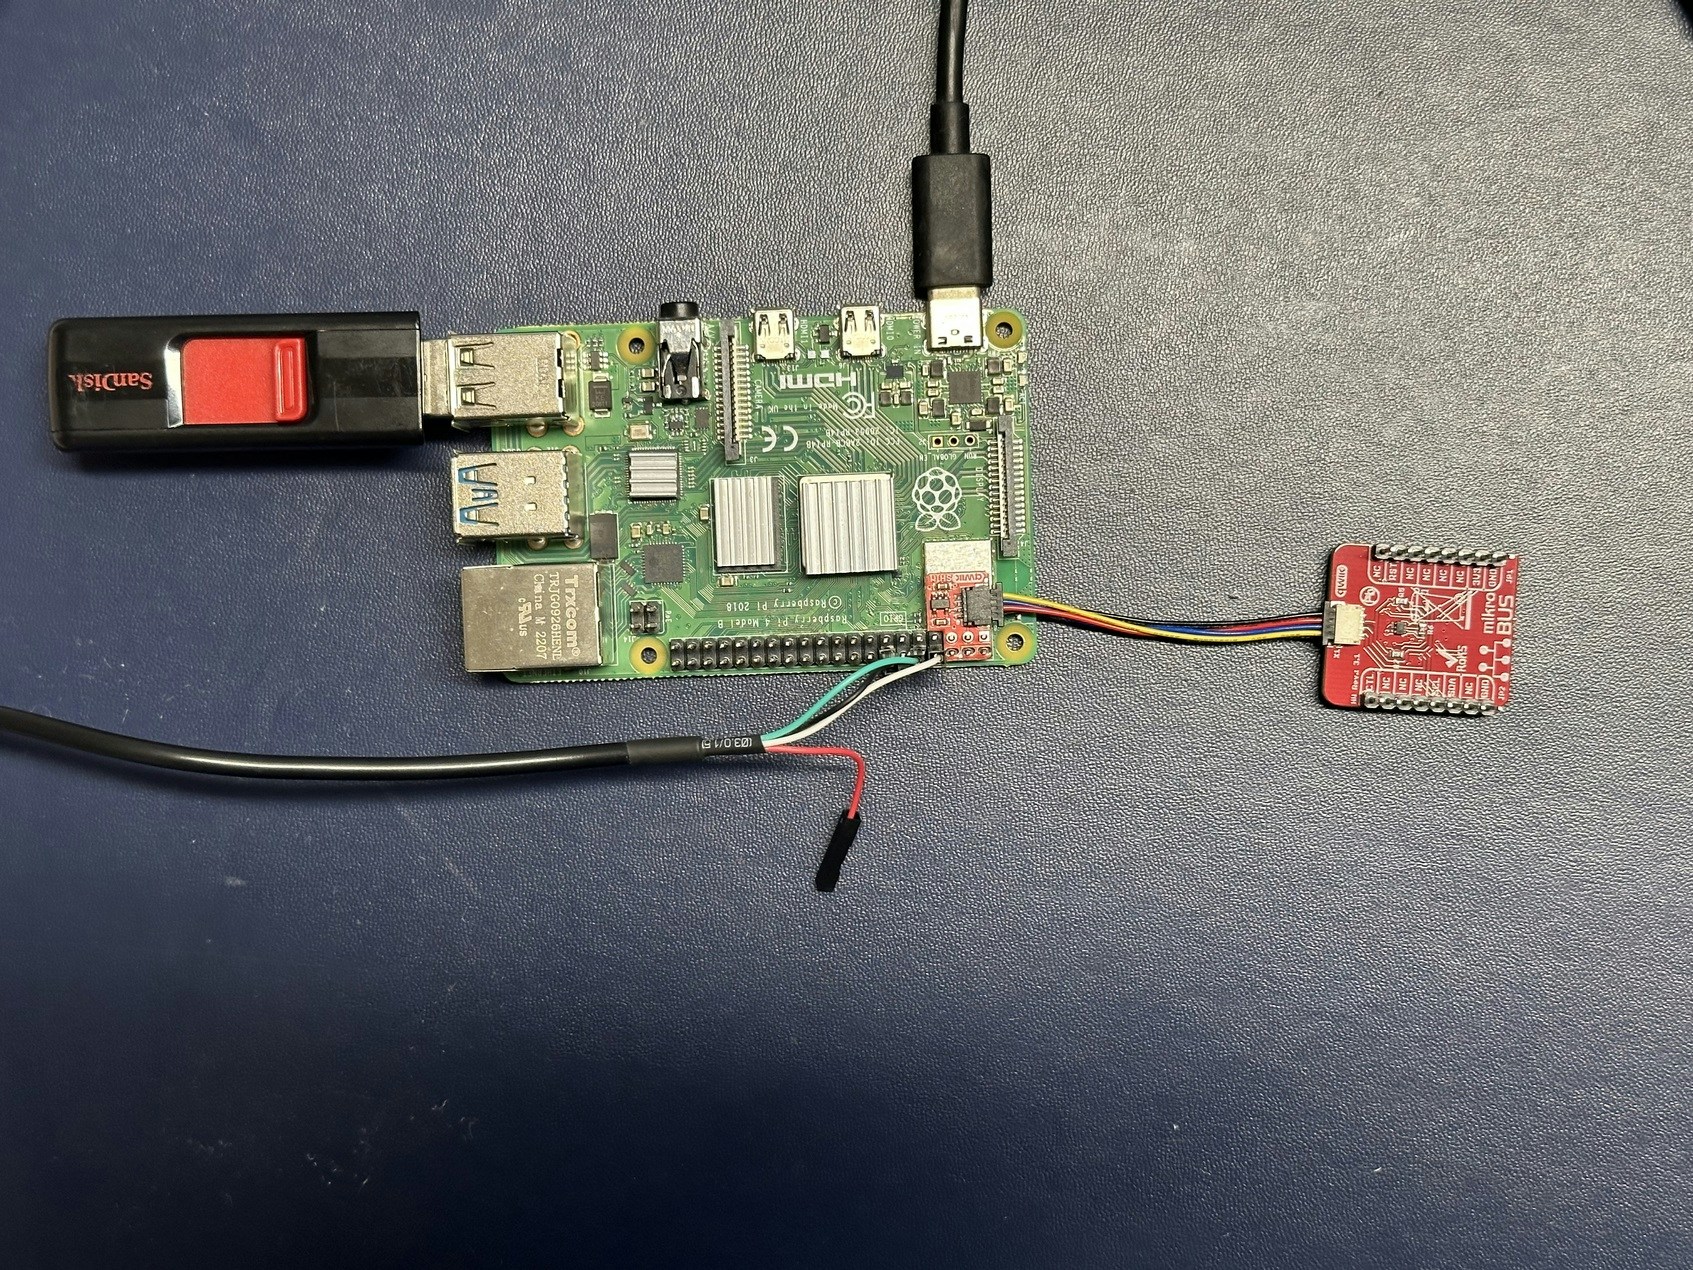
Prepare USB Drive on PC
On the desktop/laptop PC, install the Raspberry Pi
Imager application, and use it to
install a utility operating system to the USB drive. Insert the USB drive to the
PC. In Imager’s UI, select “Raspberry Pi 4” as the device, “Raspberry Pi OS
(other) > Raspberry Pi OS Lite (64-bit)” as the operating system, and the USB
drive as the storage. In the “OS customisation” step: set the host name (in this
guide our host name will be “rpi4-util”), username and password; configure
wireless LAN credential so that the RPi-4 can automatically connect to WiFi; and
enable SSH to allow a headless connection setup. Program the USB drive with the
selected OS with the custom setting. Once the flashing process completes, remove
the USB drive from the PC, and insert it to the RPi-4’s USB-A port. Make sure no
microSD card is inserted into the RPi-4.
Boot into Utility OS and Install Necessary Software
Power on the Raspberry Pi 4 device, and wait a couple of minutes for the OS to
boot up. Find the IP address of the device using a network scanning tool such as
Nmap. SSH onto the RPi-4: ssh <username>@<rpi4-ip-addr>.
Commands in the rest of this section are executed in the SSH shell on the RPi-4.
Alternatively, one can also login to the RPi-4 using a keyboard and a monitor,
or through a serial console. In this tutorial, we will use the SSH shell to send
commands to the RPi-4.
-
Keep the Raspberry Pi OS and packages up to date, and get the latest EEPROM
firmware.
thistle@rpi4-util:~ $ sudo apt update
thistle@rpi4-util:~ $ sudo apt dist-upgrade -y
thistle@rpi4-util:~ $ sudo rpi-eeprom-update -a
-
Run
sudo raspi-config to enable I2C and Serial Port interfaces. These
options are under “Interface Options” in the main menu. Click on “Finish” to
save the configuration changes, and reboot the RPi-4 for the changes to take
effect.

-
After reboot, SSH onto the RPi-4 again. Install the OPTIGA Trust V1/V3 Linux
tools.
thistle@rpi4-util:~ $ sudo apt install git
thistle@rpi4-util:~ $ git clone --recurse-submodules https://github.com/Infineon/linux-optiga-trust-m.git
thistle@rpi4-util:~ $ cd linux-optiga-trust-m
# Switch to commit for v2.1.0, which we have tested (known-good)
thistle@rpi4-util:~/linux-optiga-trust-m $ git checkout 121327aff09a8be6d960de7ea8d838ab2952ef33
# Run installation script
thistle@rpi4-util:~/linux-optiga-trust-m $ ./trustm_installation_script.sh
trustm_chipinfo command. A sample output a successful test is shown below.
thistle@rpi4-util:~/linux-optiga-trust-m $ ./bin/trustm_chipinfo
Read Chip Info [0xE0C2]: Success.
========================================================
CIM Identifier             [bCimIdentifer]: 0xcd
Platform Identifer   [bPlatformIdentifier]: 0x16
Model Identifer         [bModelIdentifier]: 0x33
ID of ROM mask                  [wROMCode]: 0x9301
Chip Type                    [rgbChipType]: 0x00 0x1c 0x00 0x05 0x00 0x00
Batch Number              [rgbBatchNumber]: 0x0a 0x01 0xbb 0x82 0x00 0x03
X-coordinate              [wChipPositionX]: 0x0042
Y-coordinate              [wChipPositionY]: 0x003c
Firmware Identifier [dwFirmwareIdentifier]: 0x80101071
Build Number                 [rgbESWBuild]: 24 40

Chip software build:
OPTIGA(TM) Trust M rev.3; Firmware Version: 3.00.2440
========================================================
Prepare microSD Card on RPi-4 Running Utility OS
We will now flash a Thistle provided embedded Linux image for
RPi-4
on the microSD card. This image will be used to demonstrate TVB. Note that we
could use a stock Raspberry Pi OS image for the TVB demo, too. However,
Raspberry Pi OS is too feature rich to harden, and hence is unlikely to be a
good platform to implement TVB in production. The Thistle image is more
lightweight and thus have a smaller attack surface, closer to a production use
case.
While the utility OS is up and running, insert the microSD card to the card
slot. This microSD card should appears as a block device /dev/mmcblk0 (one can
confirm it by looking at the tail of the output of sudo dmesg command).
thistle@rpi4-util:~ $ mkdir tvb-demo && cd tvb-demo
# fetch and decompress image
thistle@rpi4-util:~/tvb-demo $ curl -O http://downloads.thistle.tech/rpi/tvb4/base-raspberrypi4-64-thistle.wic.zst
thistle@rpi4-util:~/tvb-demo $ zstd -d base-raspberrypi4-64-thistle.wic.zst
thistle@rpi4-util:~/tvb-demo $ sha256sum base-raspberrypi4-64-thistle.wic
2330fb778e4431dde153197e020766bd1efbb11f449dc82681c123ab888064f1  base-raspberrypi4-64-thistle.wic

# write on card. Double check to make sure to use the correct device name for
# your sd card.
thistle@rpi4-util:~/tvb-demo $ sudo dd if=base-raspberrypi4-64-thistle.wic of=/dev/mmcblk0 status=progress
746685440 bytes (747 MB, 712 MiB) copied, 63 s, 11.9 MB/s
1479474+0 records in
1479474+0 records out
757490688 bytes (757 MB, 722 MiB) copied, 71.6643 s, 10.6 MB/s
thistle@rpi4-util:~/tvb-demo $ lsblk /dev/mmcblk0
NAME        MAJ:MIN RM   SIZE RO TYPE MOUNTPOINTS
mmcblk0     179:0    0  58.9G  0 disk
├─mmcblk0p1 179:1    0  71.3M  0 part
├─mmcblk0p2 179:2    0 322.4M  0 part
└─mmcblk0p3 179:3    0 322.4M  0 part
# fetch TVB-compatible uboot and boot script
thistle@rpi4-util:~/tvb-demo $ curl -O https://downloads.thistle.tech/rpi/tvb4/uboot.bin
thistle@rpi4-util:~/tvb-demo $ curl -O https://downloads.thistle.tech/rpi/tvb4/boot.scr
# mount boot partition
thistle@rpi4-util:~/tvb-demo $ mkdir -p sdboot && sudo mount /dev/mmcblk0p1 sdboot/
thistle@rpi4-util:~/tvb-demo $ ls sdboot/
bcm2711-rpi-400.dtb  fixup4cd.dat  fixup_x.dat                   start4.elf
bcm2711-rpi-4-b.dtb  fixup4.dat    Image                         start4x.elf
bcm2711-rpi-cm4.dtb  fixup4db.dat  kernel8.img                   start_cd.elf
bootcode.bin         fixup4x.dat   overlays                      start_db.elf
boot.scr             fixup_cd.dat  rpi-bootfiles-20220830.stamp  start.elf
cmdline.txt          fixup.dat     start4cd.elf                  start_x.elf
config.txt           fixup_db.dat  start4db.elf
# patch the boot partition
thistle@rpi4-util:~/tvb-demo $ sudo cp uboot.bin sdboot/kernel8.img
thistle@rpi4-util:~/tvb-demo $ sudo cp boot.scr sdboot/boot.scr
thistle@rpi4-util:~/tvb-demo $ sudo mv sdboot/Image sdboot/kernel
# Copy the kernel image to utility OS for later use
thistle@rpi4-util:~/tvb-demo $ cp sdboot/kernel ./kernel
thistle@rpi4-util:~/tvb-demo $ sync
thistle@rpi4-util:~/tvb-demo $ sudo umount sdboot
thistle@rpi4-util:~/tvb-demo $ sudo poweroff
# This command runs on a Linux PC. Change /dev/ttyUSB0 to your serial port if
# needed.
$ minicom -b 115200 -D /dev/ttyUSB0
 Now cut off the power of the RPi-4. Remove the microSD card from the RPi-4, and
re-plug in the USB drive. We will now sign the kernel image using Thistle
Control Center, and use the utility OS to provision the Trust M.
Now cut off the power of the RPi-4. Remove the microSD card from the RPi-4, and
re-plug in the USB drive. We will now sign the kernel image using Thistle
Control Center, and use the utility OS to provision the Trust M.
Sign Linux Kernel Image in Thistle Control Center
All the steps in this section are performed on a PC terminal, except for those
commands starting with the thistle@rpi4-util:~ $ prompt, which are executed on
the RPi-4.
-
Power on the RPi-4 again. After the utility OS boots up, copy the previously
saved Linux kernel image to the PC. Copying between the utility OS and the PC
can be done with
scp or a USB thumb drive.
with SCP
with USB thumb drive
# On PC's terminal
$ scp <username>@<rpi4-ip-addr>:~/tvb-demo/kernel .
# check the sha256sum of the kernel image used in this tutorial
$ sha256sum kernel
897e77da1d75ae70d8ff7a760cc0870d5120ab18661b1587c86e8ccffacce52e  kernel
If for any reason you can’t use scp on the PC, a second USB thumb drive (with
at least 512MB storage) can be used for file transfer. First format this USB
thumb drive on the PC as FAT32. Then insert it to the RPi-4 running the
utility OS.# In a shell on utility OS
thistle@rpi4-util:~ $ cd ~/tvb-demo
# The second USB drive should show up as /dev/sdb1. Double check, and change
# to the appropriate device node as needed
thistle@rpi4-util:~/tvb-demo $ mkdir -p transfer && sudo mount /dev/sdb1 transfer/
thistle@rpi4-util:~/tvb-demo $ sudo cp kernel transfer/kernel
thistle@rpi4-util:~/tvb-demo $ sync && sudo umount transfer/
-
If you have not used Thistle before, first sign up with
Thistle. Then sign in to the Thistle Control
Center, and create a project.
-
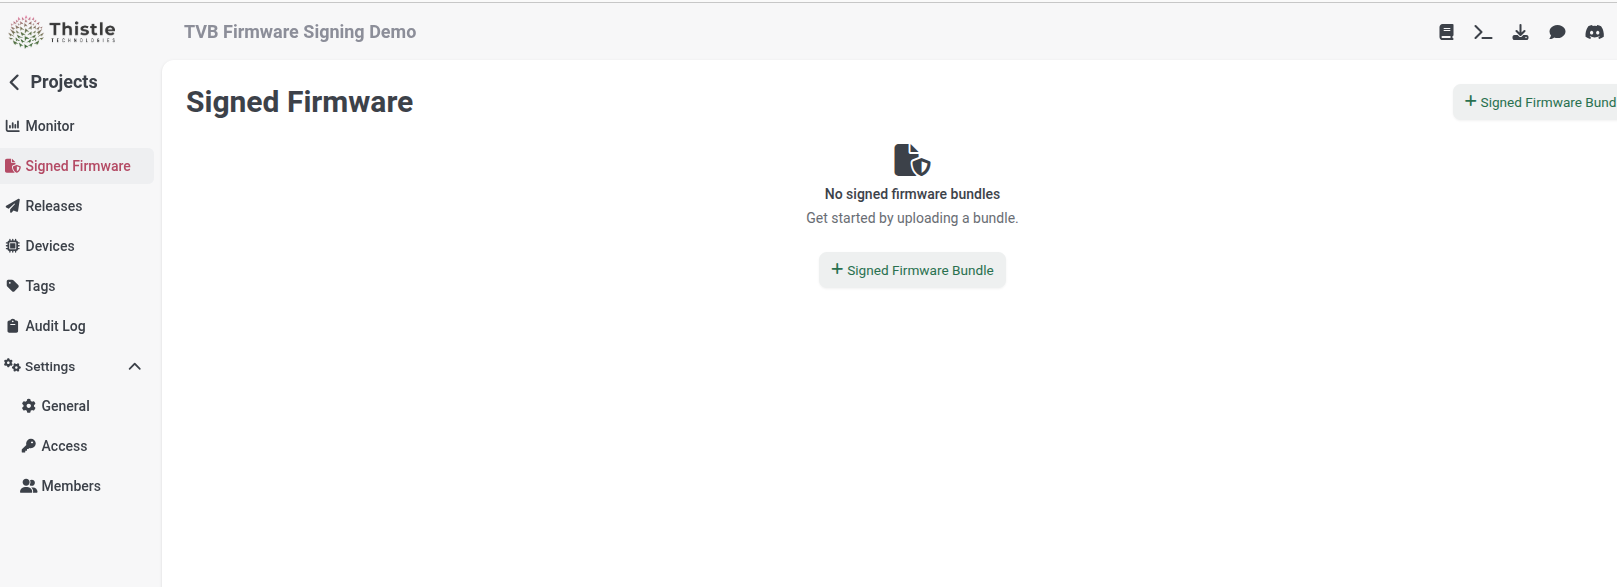
In the project you just created, go to the “Signed Firmware” view, and click
the “+Signed Firmware Bundle” button to create a new signed firmware bundle.
-
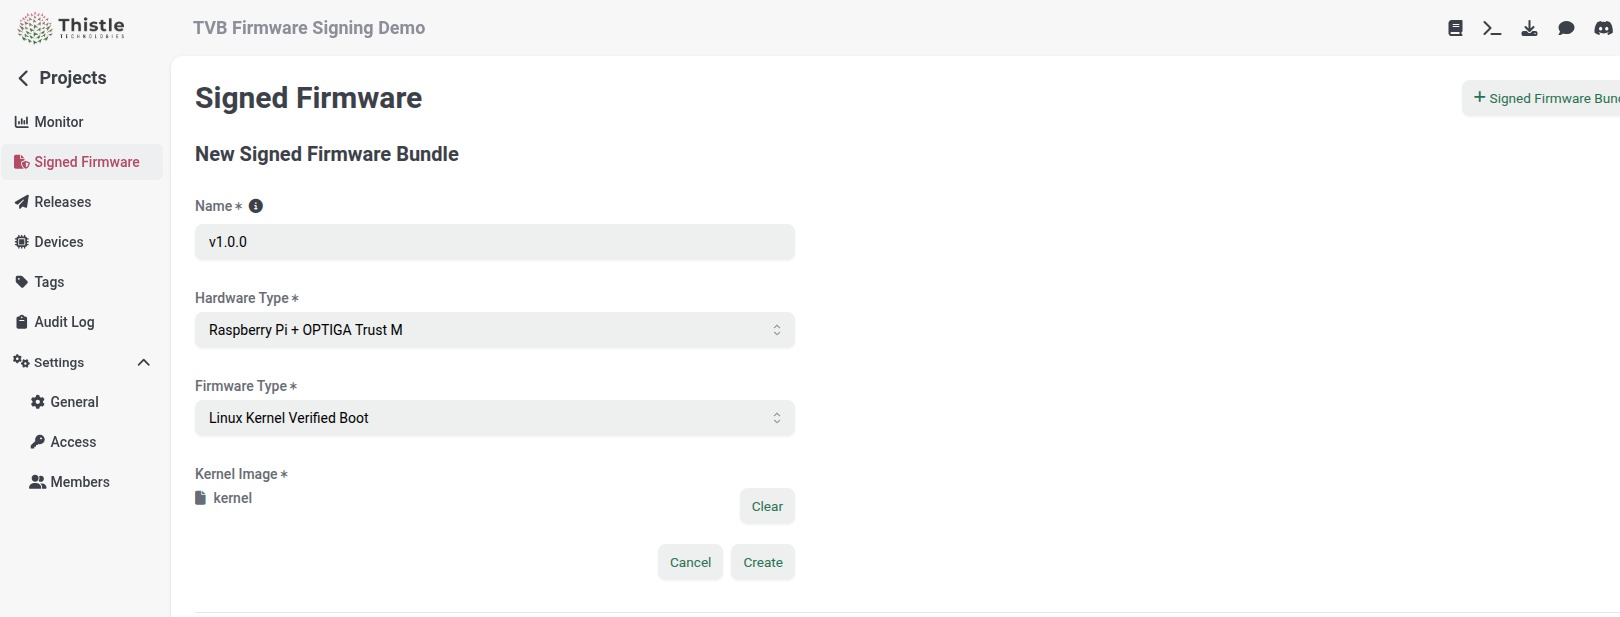
A TVB signing key pair is generated when the first signed TVB firmware bundle
is created. Choose a value you like for
Name (e.g., “v1.0.0”). Select
“Raspberry Pi + OPTIGA Trust M” for Hardware Type, and “Linux Kernel
Verified Boot” for Firmware Type. Pick the earlier kernel image file
kernel as the Kernel Image. Click on the “Create” button to get it
signed.
-
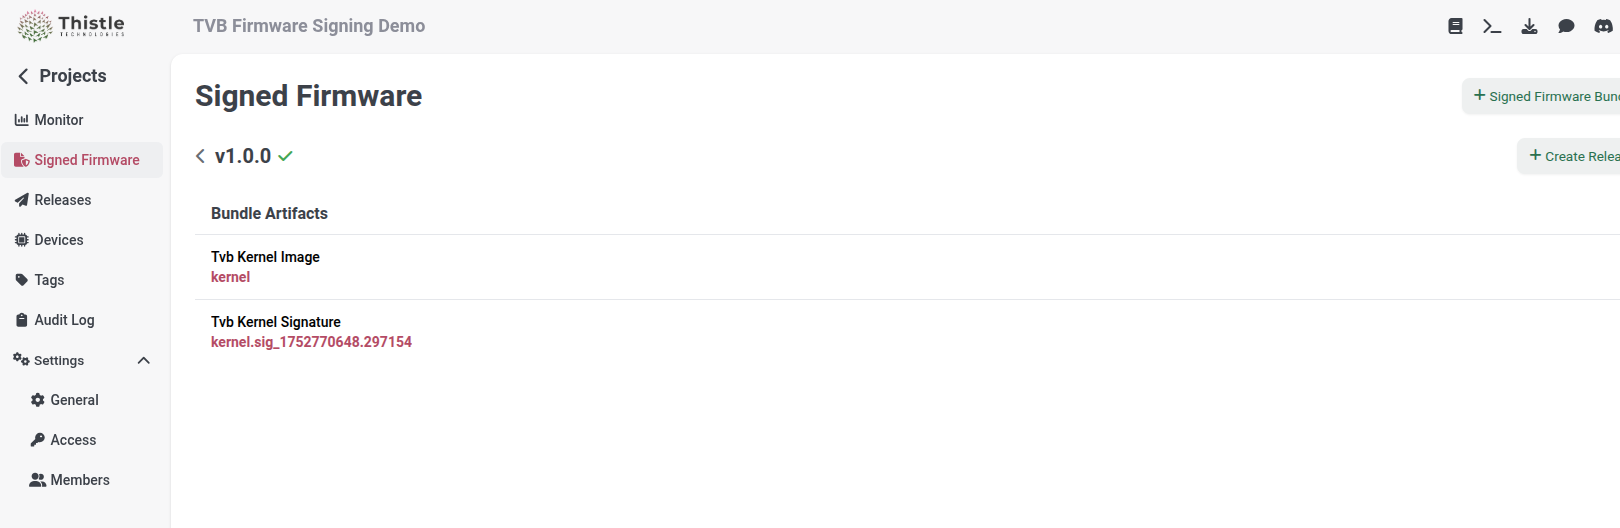
When the kernel image is signed successfully, a signed firmware bundle should
appear in “Signed Firmware”. Click through and download the “Tvb Kernel
Signature” file (
kernel.sig_<timestamp>) to PC.
-
Copy the kernel signature file to the RPi-4.
with SCP
with USB thumb drive
scp kernel.sig_<timestamp> <username>@<rpi4-ip-addr>:~/tvb-demo/kernel-sig
On PC, copy (or “drag and drop”) the downloaded kernel signature file
kernel.sig_<timestamp> to the attached USB thumb drive, and rename it to
kernel-sig. Eject the USB drive from PC’s file system, remove it from PC,
and insert it back to the RPi-4.# In a shell on utility OS
thistle@rpi4-util:~ $ cd ~/tvb-demo
# Change /dev/sdb1 to the appropriate device node as needed
thistle@rpi4-util:~/tvb-demo $ sudo mount /dev/sdb1 transfer/
thistle@rpi4-util:~/tvb-demo $ cp transfer/kernel-sig kernel-sig
thistle@rpi4-util:~/tvb-demo $ sudo umount transfer/
Copy Kernel Signature to microSD Card
Re-insert the microSD card to the RPi-4 (which is running the utility OS). SSH
onto the RPi-4, and add the kernel signature file to the microSD card.
# on PRi-4 in SSH shell
thistle@rpi4-util:~ $ cd ~/tvb-demo
thistle@rpi4-util:~/tvb-demo $ sudo mount /dev/mmcblk0p1 sdboot/
thistle@rpi4-util:~/tvb-demo $ sudo cp kernel-sig sdboot/
thistle@rpi4-util:~/tvb-demo $ sync
thistle@rpi4-util:~/tvb-demo $ sudo umount sdboot
Provision TVB Public Key to Trust M on RPi-4 Running Utility OS
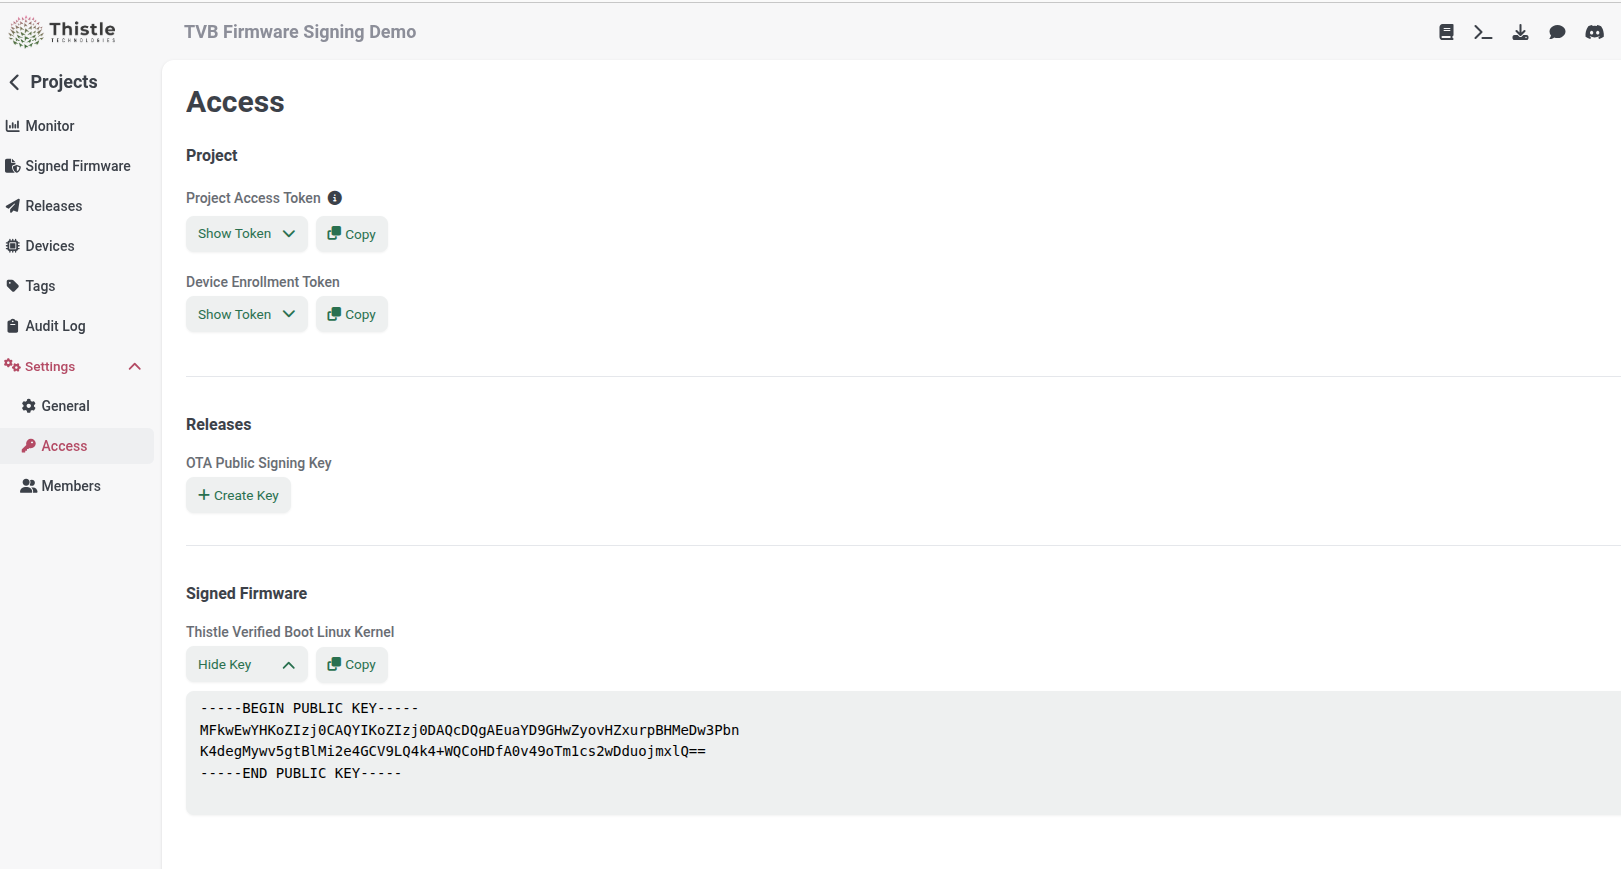
When the first signed TVB firmware bundle is created, a Cloud-KMS-backed key
pair is also generated. Go to “Settings > Access”. Under the “Signed Firmware”
section, the TVB public verification key appears. You can now copy the public
key to your clipboard.
 Provision the public key to the Trust M using the RPi-4, as follows.
# on RPi-4 in SSH shell
thistle@rpi4-util:~/tvb-demo $ cat > tvb-pk.pem << EOF
<Paste the copied public key from clipboard>
EOF
thistle@rpi4-util:~/tvb-demo $ sudo apt install xxd
# convert public key to binary format
thistle@rpi4-util:~/tvb-demo $ openssl ec -pubin -in tvb-pk.pem -outform DER 2>/dev/null \
  | xxd -i -s 27 | xxd -r -p > tvb-pk.bin
# write the public key binary file to Trust M's object 0xe0e8. Your public key
# value is likely different
thistle@rpi4-util:~/tvb-demo $ ../linux-optiga-trust-m/bin/trustm_data -X -e -w 0xe0e8 -i tvb-pk.bin

Bypass Shielded Communication.
========================================================
Root CA Public Key Cert1    [0xE0E8]
Offset: 0
Input data :
    B9 A6 03 F4 61 F0 67 2A 2F 1D 9C 6E AE 90 47 31
    E0 F0 DC F6 E7 2B 87 5E 80 CC B0 BF 98 2D 06 53
    22 D9 EE 06 09 5F 4B 43 89 38 F9 64 02 A0 70 DF
    03 4B F8 F6 84 E6 D5 CB 36 C0 37 6E A2 39 B1 95

OPTIGA execution time: 0.0597 sec.
Write Success.
========================================================

# make the public key read-only - note that this will make this object on the
# Trust M immutable. Skip this step if you are not yet going to production.
thistle@rpi4-util:~/tvb-demo $ ../linux-optiga-trust-m/bin/trustm_metadata -X -C n -w 0xe0e8
Thistle Verified Boot Demo
With all the preparation work, the TVB demo is actually a boring one.
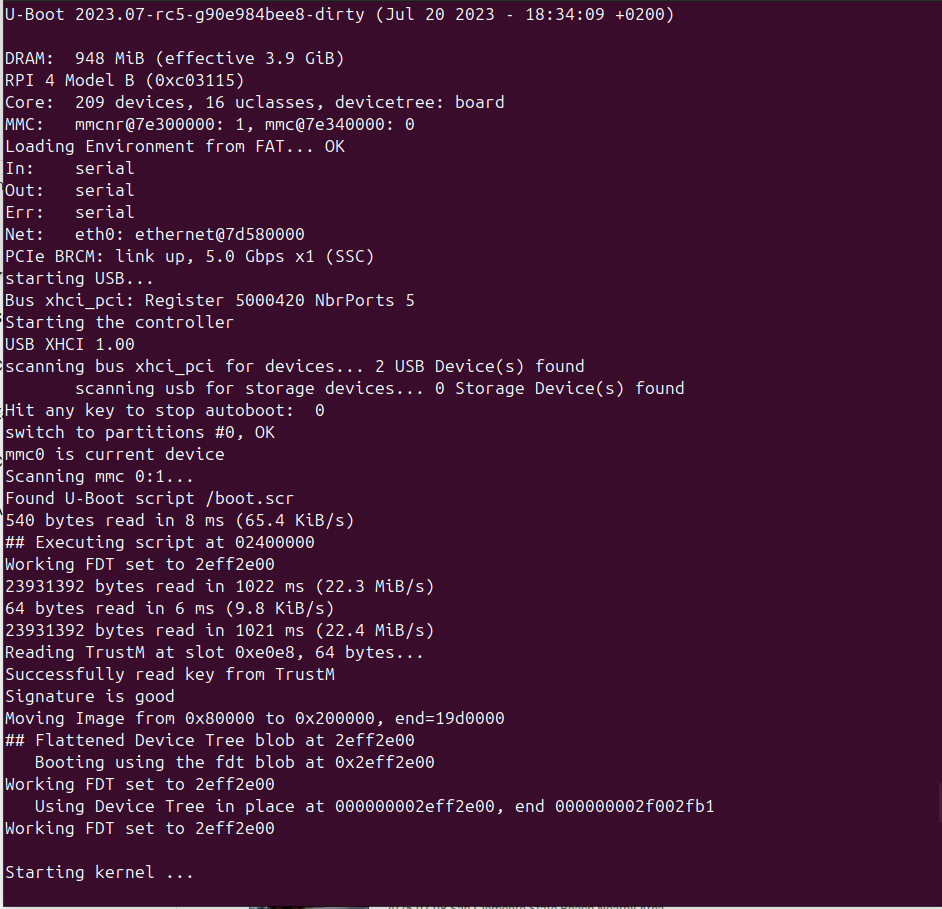
The Happy Path
Power on the RPi-4, and watch the serial port output on a PC terminal. You
should be able to see the following lines in the U-Boot boot log
Reading TrustM at slot 0xe0e8, 64 bytes...
Successfully read key from TrustM
Signature is good
...

Starting kernel ...
 That’s the TVB demo. If you connect the RPi-4 using an Ethernet cable, you
should be able to SSH to the custom OS that comes with the Thistle image, and
play with it.
That’s the TVB demo. If you connect the RPi-4 using an Ethernet cable, you
should be able to SSH to the custom OS that comes with the Thistle image, and
play with it.
The username for this image is a and the password is also a.
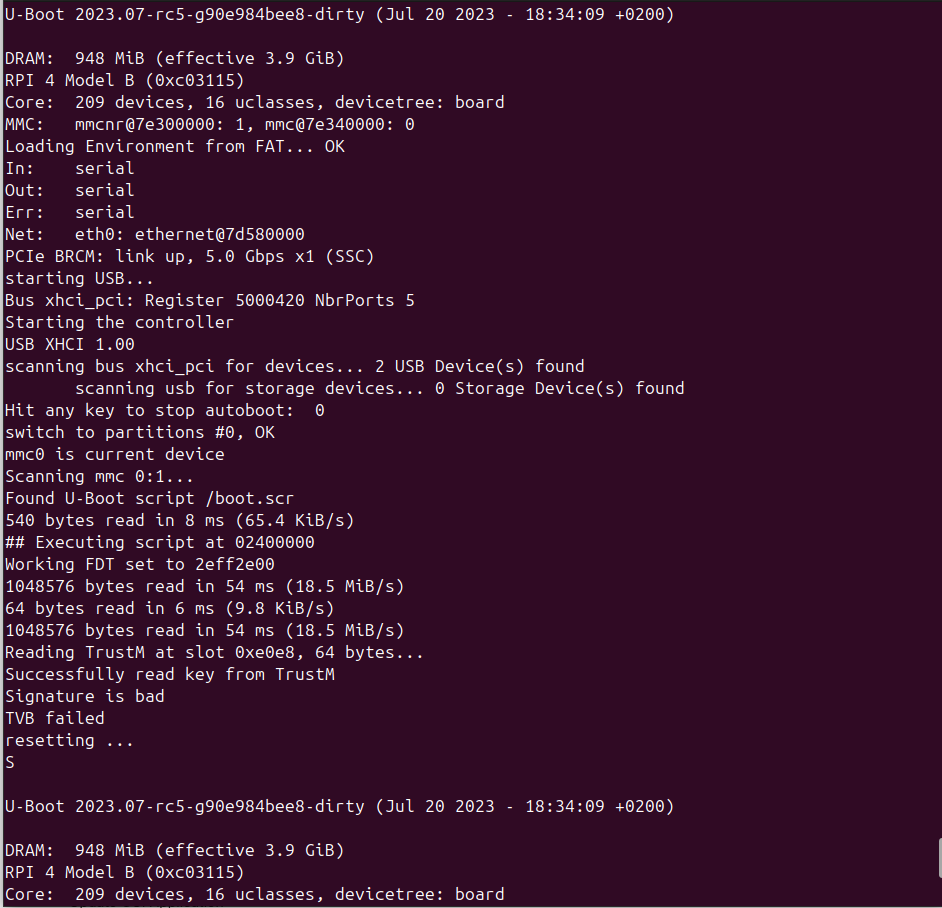
Boot with a Tampered Kernel
If you change the content of the kernel file in the boot partition of the
microSD card (you can do this using the utility OS on the USB drive), booting
the RPi-4 from the microSD card next time should cause a TVB boot failure and a
rebooting loop, and hence the tampered kernel won’t boot. The following
screenshot shows the U-Boot boot log when the authentic kernel image kernel is
replaced with a file of 1MB zero bytes.
One can use the following command to create a tampered “kernel image” filled
with 1MB zero bytes on the RPi-4 running the utility OSthistle@rpi4-util:~/tvb-demo $ head -c $((1024*1024)) /dev/zero > kernel.bad
kernel.bad to the boot partition of the microSD card, and rename it to
kernel, using the following commands# Insert the microSD card when the utility OS is running
thistle@rpi4-util:~/tvb-demo $ mkdir -p sdboot && sudo mount /dev/mmcblk0p1 sdboot/
thistle@rpi4-util:~/tvb-demo $ sudo cp kernel.bad sdboot/kernel
thistle@rpi4-util:~/tvb-demo $ sync && sudo umount sdboot