Thistle Verified Boot
Thistle Verified Boot Overview
Learn about Thistle’s verified boot solution for embedded Linux devices
TThistle Verified Boot (TVB) protects the boot sequence of embedded devices. We integrated this solution around two elements: U-Boot as a bootloader, and the Infineon OPTIGA Trust M as a root of trust. Our TVB solution offers a Cloud Signing facility that is baked by the Google Cloud Platform and their Cloud Key Management Service (KMS). This solution is designed to be easy to integrate and secure by design.
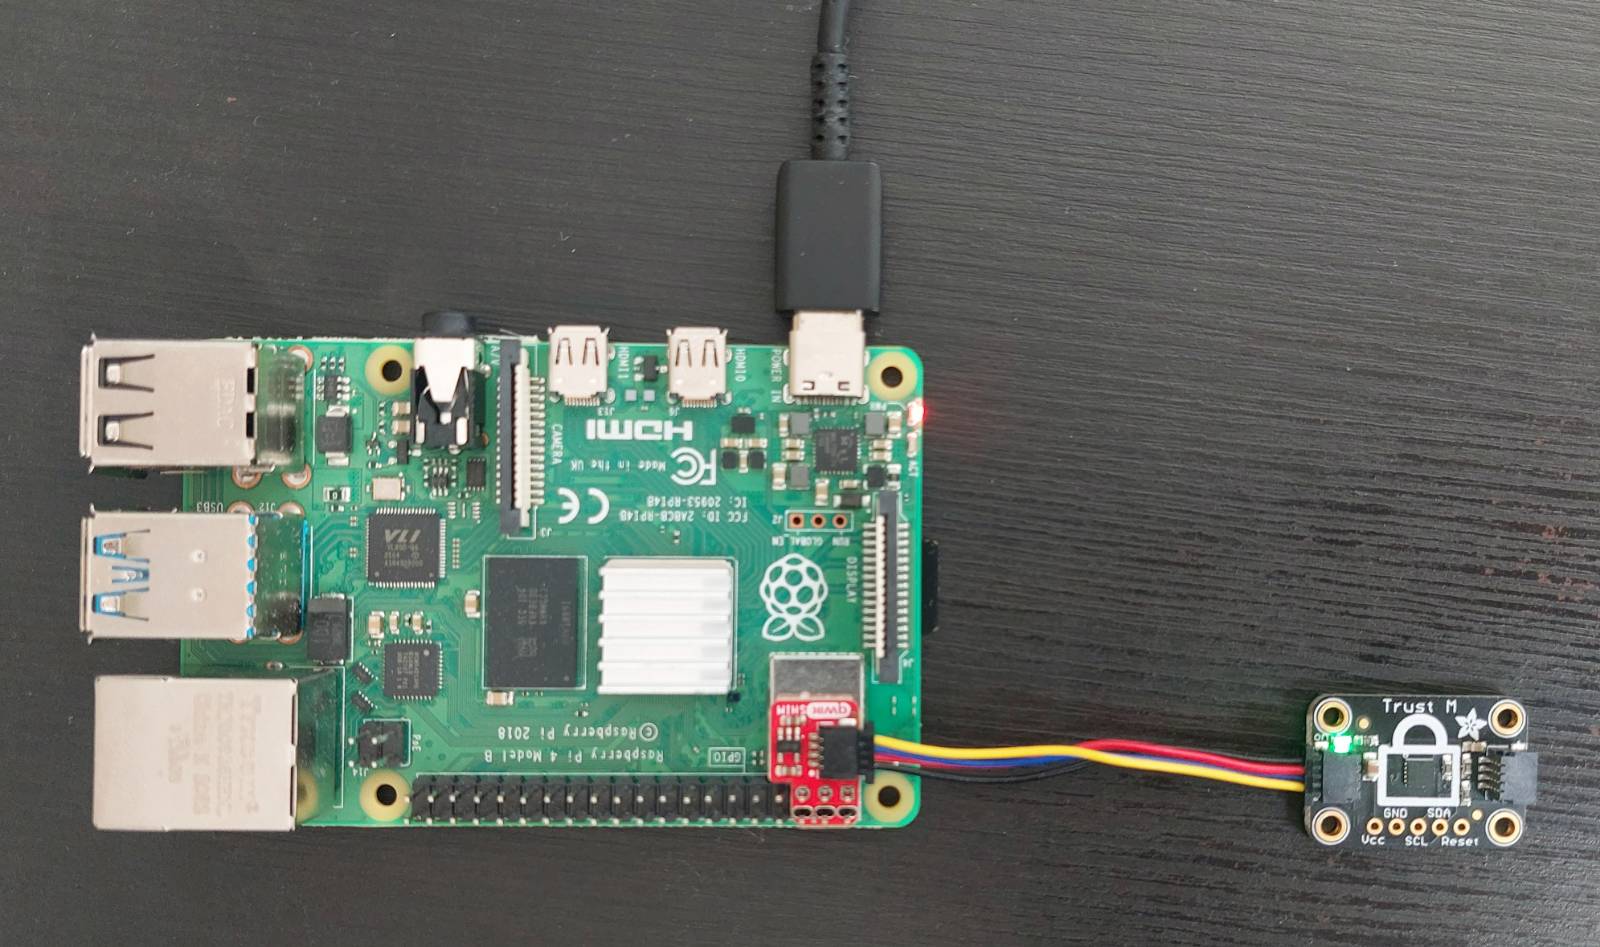 First, you need to connect the Trust M to your platform. See the platform page to lear about the expected pinout. See the example above for an example on a Raspberry Pi 4.
We will now transform the public key to a format that the Trust M can understand. This is done by converting the public key using
We can now test the connectivity to the Trust M and write the public key to it.
First, you need to connect the Trust M to your platform. See the platform page to lear about the expected pinout. See the example above for an example on a Raspberry Pi 4.
We will now transform the public key to a format that the Trust M can understand. This is done by converting the public key using
We can now test the connectivity to the Trust M and write the public key to it.
Features
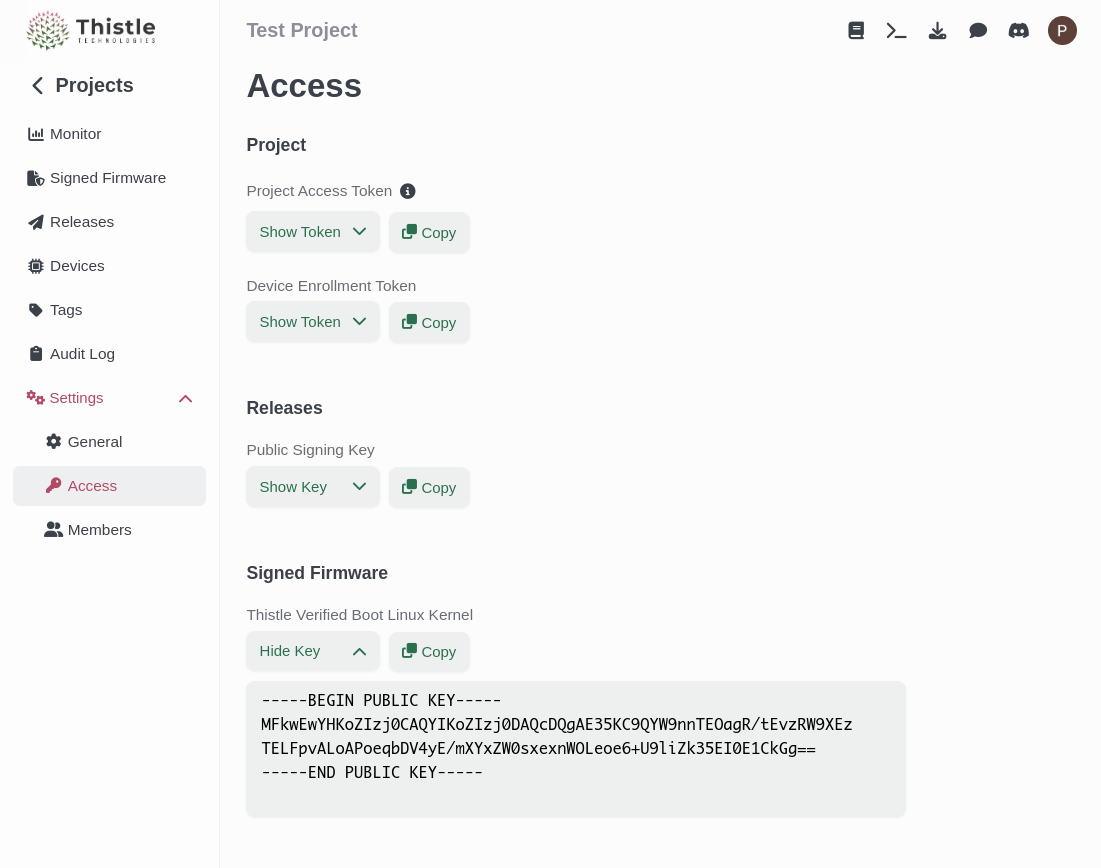
To enable the Cloud KMS solution to your project, head onto your Thistle account, and head on to the Settings > Access section. You can create your key pair by clicking on “Create Key”. You can then copy the public key on your clipboard.
Public key writing procedure
Now that the keypair has been generated, you need to write the public key to your Infineon OPTIGA Trust M device. As the chip is operated via I2C, there are multiple ways to perform this operation. For all the platforms we support, we provide the tooling to write the public key to the Trust M. It either comes directly in the provided image (Raspberry Pi 4, Beagle Bone Black), or as a separate binary to download.
First, you need to connect the Trust M to your platform. See the platform page to lear about the expected pinout. See the example above for an example on a Raspberry Pi 4.
We will now transform the public key to a format that the Trust M can understand. This is done by converting the public key using openssl.